Installation of Implex plugin
The Implex plugin contains the two plugins Import and Linker for the Uniplex.
Install the plugin in Remote admin
The desired CortexEngine instance must have a license for the plugin!
Uniplex required!
This plugin can only be used in the context of the Uniplex!
The CortexEngine Starter Edition already contains the plugin in full and the permissions are assigned.
Requirements for the installation in the CortexEngine User Group Edition
The plugin is available as a .xjz file format.
- Java 19 installation or higher
- License (Cortex-Ip-UE)
- installed web server
- is installed web server:
- Implex.jar file
- jdom.jar
- json.jar
- juniversalchardet.jar
-
libcortex-cljni.xx
(an operating system-dependent Cortex Java library whose extension must be adapted to macOs, Linux or Windows)
Information on installing the CortexEngine User Group Edition can be found here.
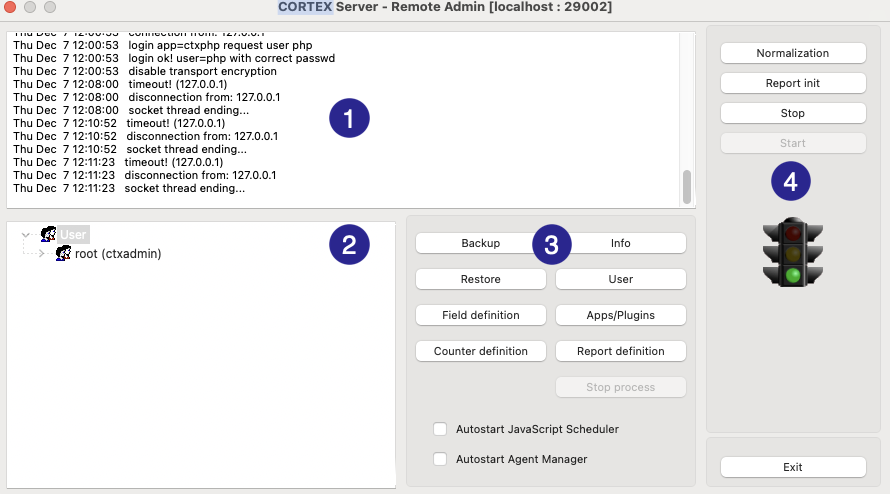
This plugin is installed using the Remote admin.
Here's how it works: install plugin
-
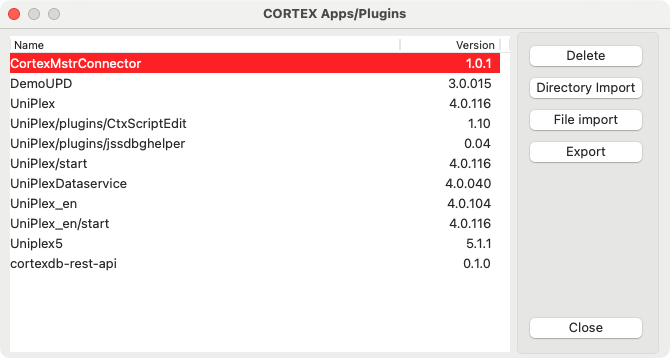
click the button Apps/Plugins (area 3) in the main window of the Cortex-IP Remote admin
-
the plugin is selected and installed via the buttons Directory Import (for plugin in folder form) or File Import (for plugin as XJZ file):
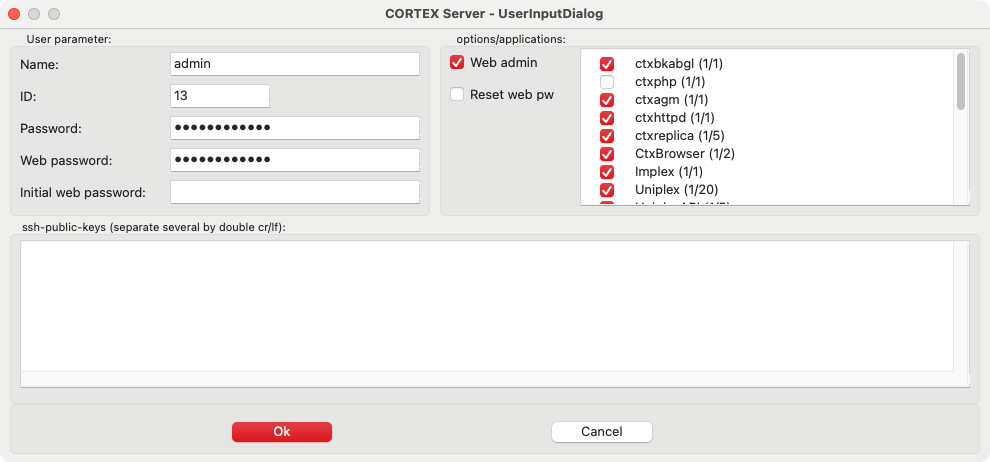
The plugin must be activated for all desired users by selecting the corresponding permission.
Here's how it works: set user permissions
-
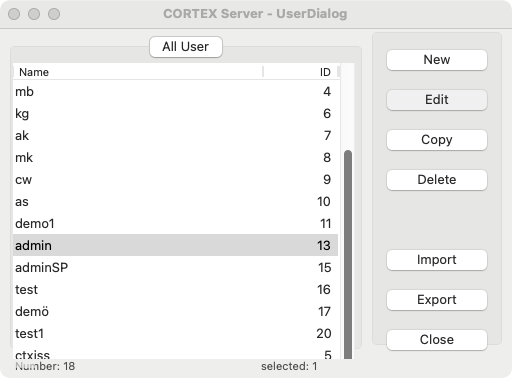
click the button User (area 3) in the main window of the Cortex-IP Remote admin
-
select the desired user in the UserDialog and click the button Edit:
-
set the desired permissions in the UserInputDialog in the options/applications area:
Plugin im Uniplex
Plugin in der CortexEngine User Group Edition aktivieren und zuweisen
In the CortexEngine Starter Edition, the plugin is already activated and assigned to the user Admin.
After installation in the CortexEngine, the following steps activate the plugin in the Uniplex. Once the plugin has been assigned to a user, the corresponding button is available in the quick launch bar.
-
activate the plugin in one (or more) plugin template(s)
Here's how it works: activate a plugin under Plugin templates
-
open the Plugin templates
The button Add
 is used to configure new entries and the button Edit
  is used to configure existing entries.
 -
select the desired template and activate the plugin Email reporter
In the dialog header, a template can be created with the button Add
and another template can be selected with the button Load template  . The template will be removed with the button Delete template
  .
.Parameters Meaning Note name meaningful name of the plugin template available plug-in buttons plugins available in the CortexEngine activate with activated plug-in buttons plugins that should be visible for users with this plugin template remove with 
change order with and
and 
-
-
assign the plugin template(s) to the desired users in the user administration
Here's how it works: assign the plugin to users
-
open the tab Templates under user administration
-
assign the desired plugin template to the user
-
click the button Save changes (or Cancel on the top right)
-
close the system settings
The button with the name of the plugin appears in the quick launch bar on the left.
-