Field templates
Which fields a defined user is allowed to see / edit is defined in field templates by activating the corresponding checkboxes.
The following actions are possible for field templates:

The image shows the field templates: (1) navigation, (2) button Groups, (3) button Edit
, (4) a list with all field templates, (5) button Add
, (6) buttons with options for export and import
The two buttons Edit ![]() and Add
and Add ![]() open the editor, which is used to edit the field template.
open the editor, which is used to edit the field template.
If the function *Groups is active, the field templates can be organized into groups for simplified management.
Warning
- Changes in system settings often only take effect when a restart is carried out after closing the system settings (menu item under the button with the user name at the top right, see also introduction).
- If another user with admin rights is currently editing this system setting, the red icon lock
 appears in the header and a warning message appears with the name of the currently active user.
Add a field template
To add a field template, click the button Add ![]() .
.
Enter a template name and deactivate the checkboxes of the fields that should not be visible or whose content cannot be edited.
You can restrict the selection of fields displayed using the filter at the bottom or by selecting the record type at the top right.
Table with all elements of the editor
| Name | Meaning | Note |
|---|---|---|
| button Create template | add new template | |
| button Load template | load existing template | |
| field Template name | name to identify the field template | |
| checkboxes "select all" | select or deselect all field names | |
| select Record type | restrict the list of displayed field names to the fields that are used in a record type | |
| checkbox Visibility | should this field be displayed? | default is visible |
| checkbox Edit field content | can this field content be edited? | default is can be edited |
| field Filter | search list of displayed field names | |
| button Delete template | deletion is only possible if the field template is not used by a user | |
| button Create copy | use the currently open field template as a template for a new field template | |
| button Save template |
Edit a field template
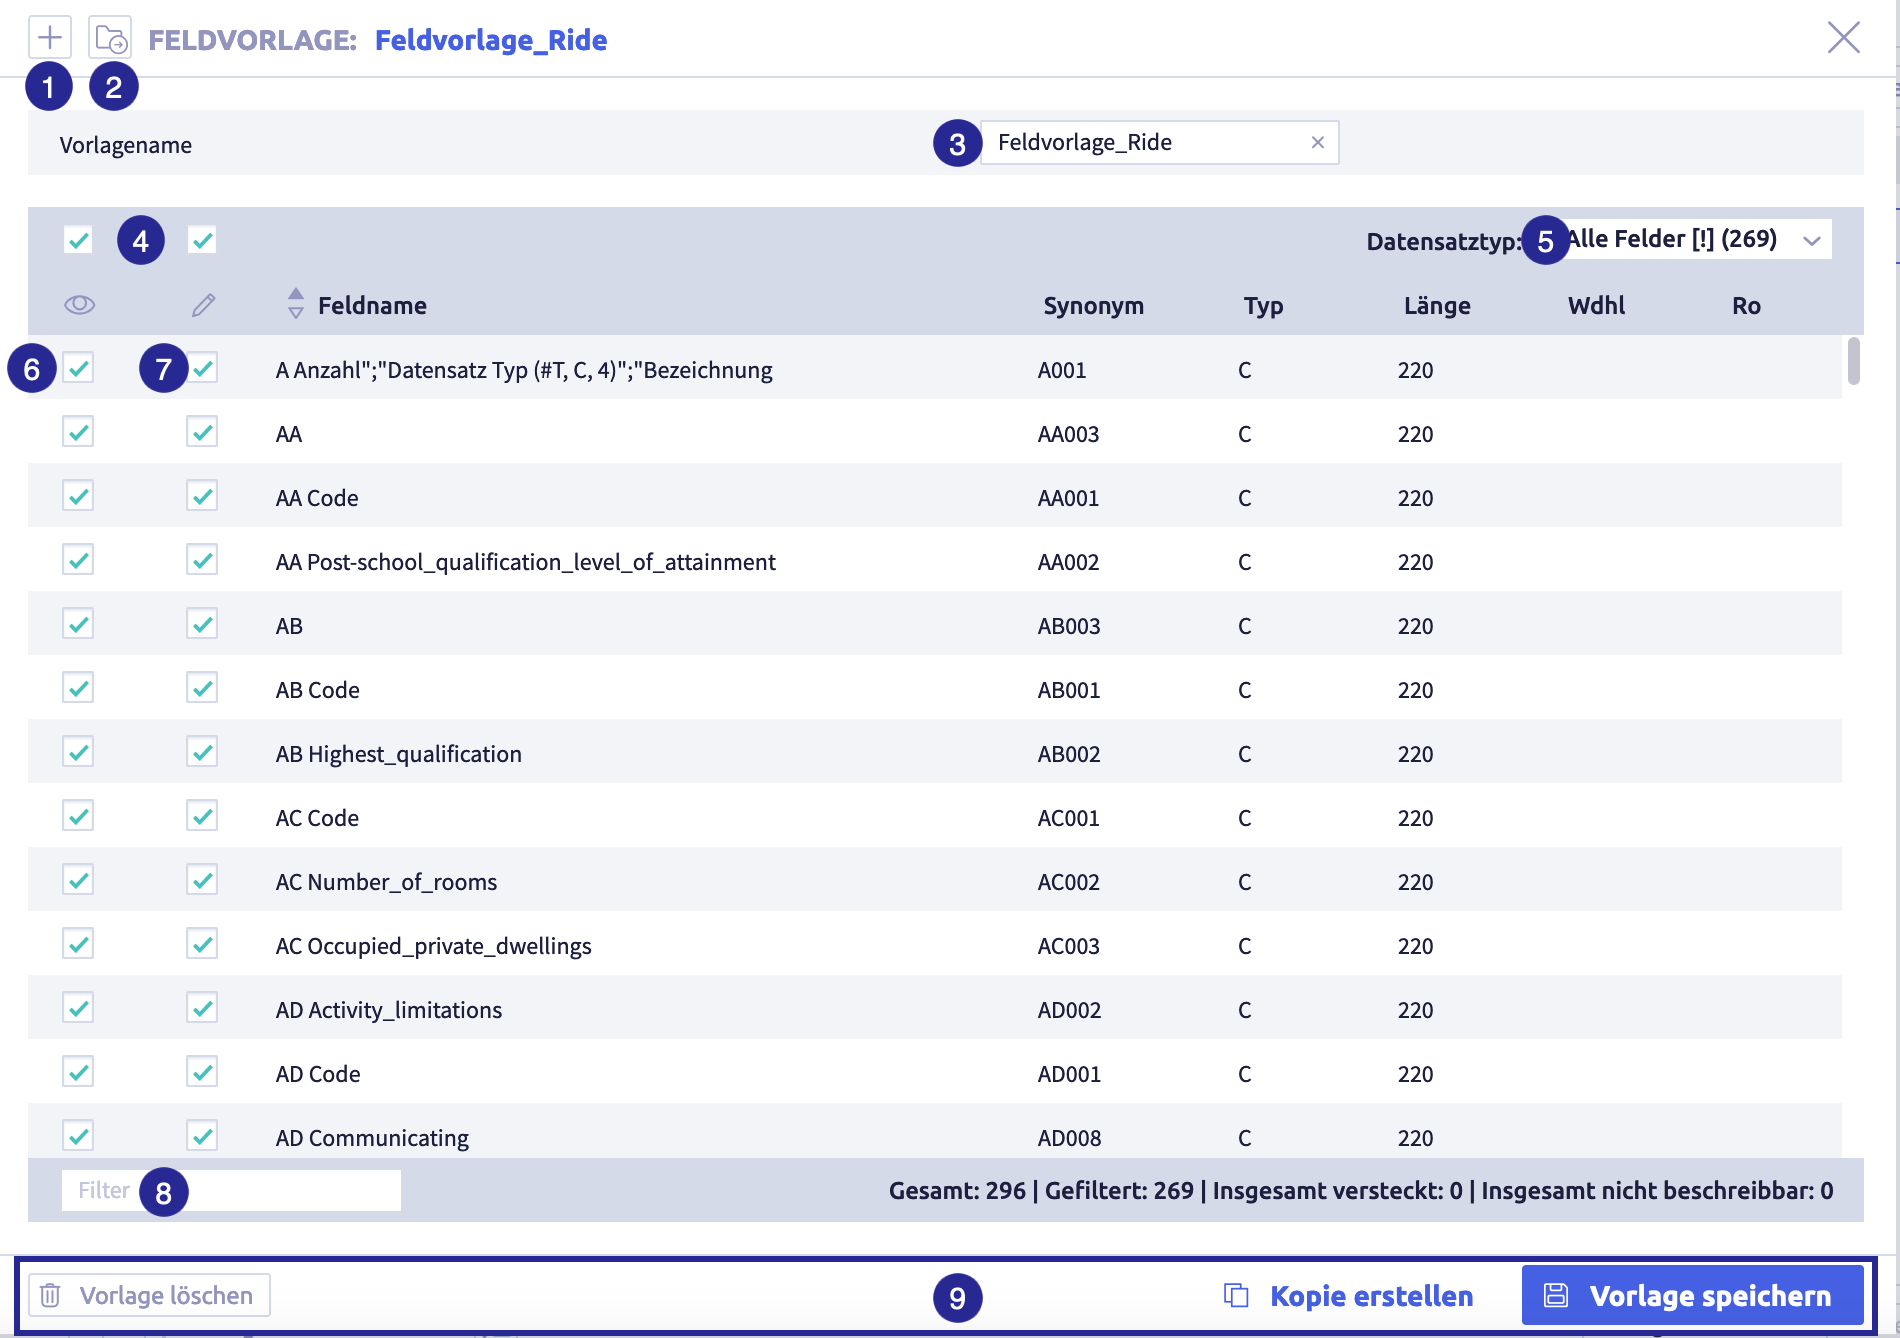
The image shows the editor: (1) button Create template
, (3) field Template name, (4) checkboxes, to select or deselect everything, (5) selection to restrict the list of field names to fields that are used in a record type, (6) checkbox for the visibility of a field, (7) checkbox for the editable nature of a field, (8) field Filter, to search for field names, (9) footer with buttons Delete template
,Create copy
, Save template
Edit all elements as required.
Table with all elements of the editor
| Name | Meaning | Note |
|---|---|---|
| button Create template | add new template | |
| button Load template | load existing template | |
| field Template name | name to identify the field template | |
| checkboxes "select all" | select or deselect all field names | |
| select Record type | restrict the list of displayed field names to the fields that are used in a record type | |
| checkbox Visibility | should this field be displayed? | default is visible |
| checkbox Edit field content | can this field content be edited? | default is can be edited |
| field Filter | search list of displayed field names | |
| button Delete template | deletion is only possible if the field template is not used by a user | |
| button Create copy | use the currently open field template as a template for a new field template | |
| button Save template |
Duplicate a field template
A field template can be used as a template for another field template. For this purpose, click the button Create copy in the editor and edit the template as required.
If the template name is not changed, the new field template is saved as Copy of X.
Table with all elements of the editor
| Name | Meaning | Note |
|---|---|---|
| button Create template | add new template | |
| button Load template | load existing template | |
| field Template name | name to identify the field template | |
| checkboxes "select all" | select or deselect all field names | |
| select Record type | restrict the list of displayed field names to the fields that are used in a record type | |
| checkbox Visibility | should this field be displayed? | default is visible |
| checkbox Edit field content | can this field content be edited? | default is can be edited |
| field Filter | search list of displayed field names | |
| button Delete template | deletion is only possible if the field template is not used by a user | |
| button Create copy | use the currently open field template as a template for a new field template | |
| button Save template |
Delete a field template
A field template is deleted in the editor. For this purpose, click the button Delete template in the footer.
A field template can only be deleted if it is not being used by a user.
Organize field templates into groups
If the function Groups is active, the record types can be organized into groups for simplified management.
The following actions are possible:
- create groups
- rename groups
- delete groups
- add elements to a group
- remove elements from a group
Note
The actions are shown using the example Field management.
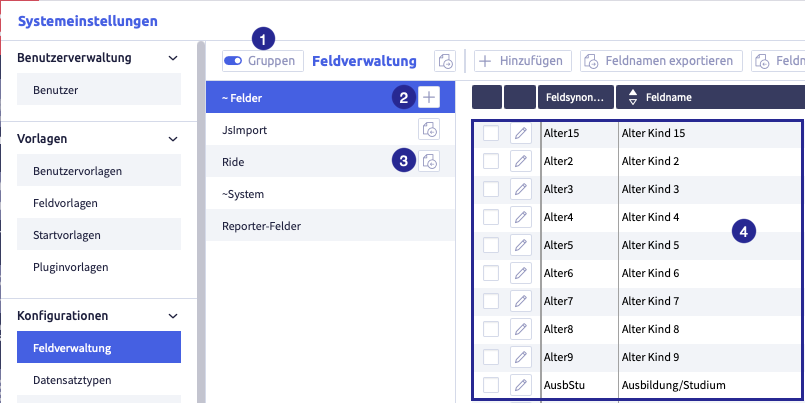
The image shows the field administration with active groups: (1) button Activate groups, (2) button Add group
, (4) fields from the currently active group
Create a group
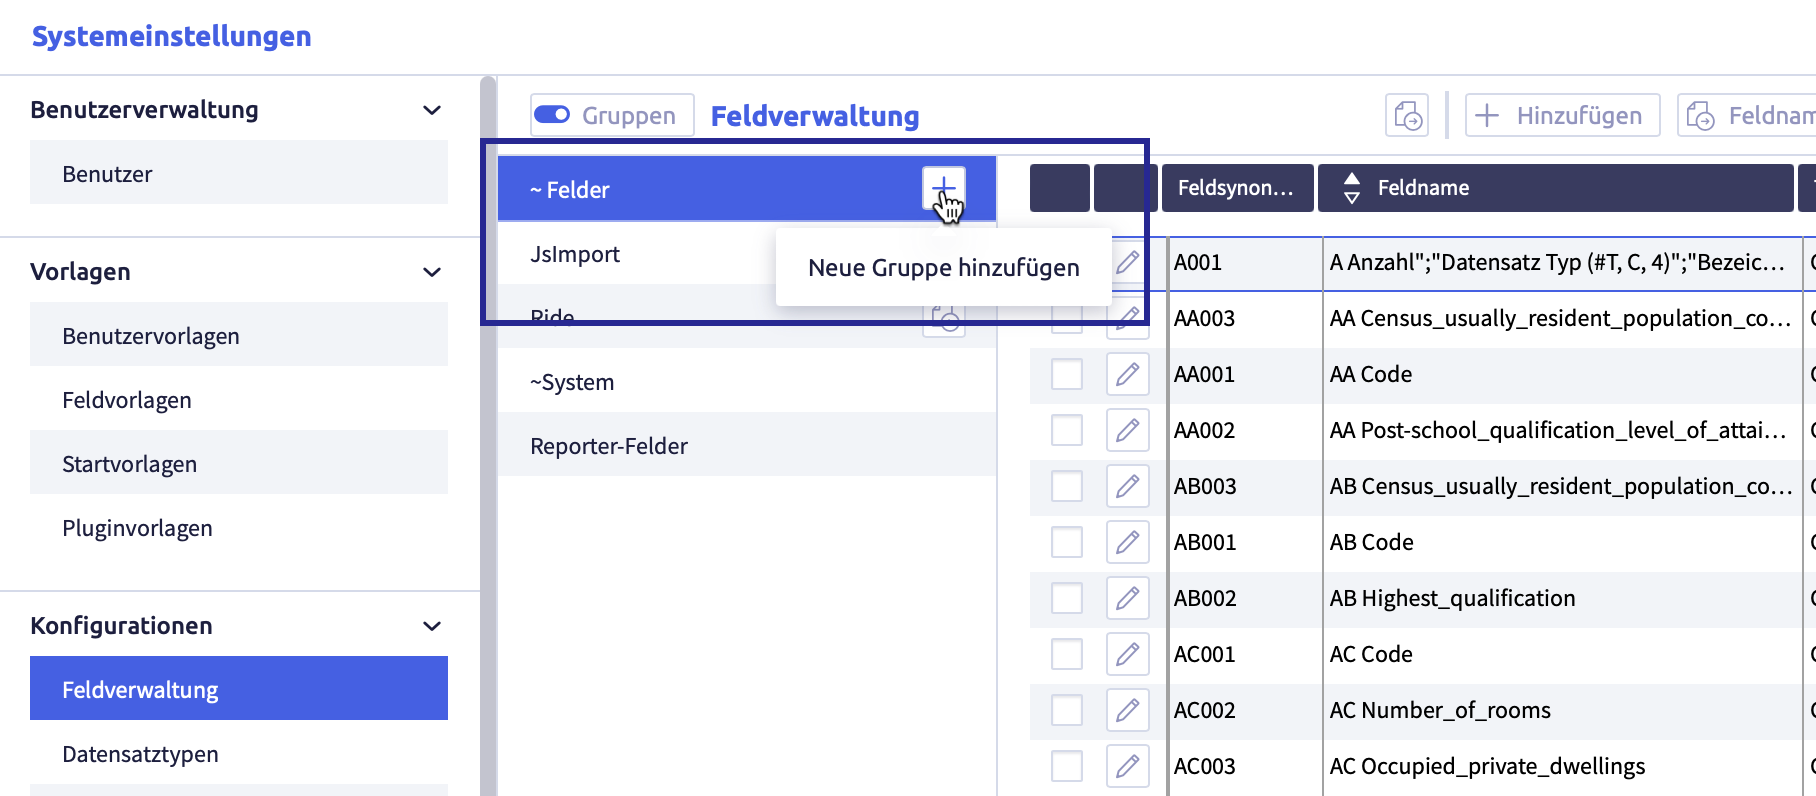
The image shows the field administration with active groups
Create user-defined groups
-
click the button Add group
A new row will be added:
-
enter the name of the group
-
click the button Save

The list with the group names will be updated, the group has been sorted alphabetically.
Rename a group
-
click the group you want to edit
The button Edit
will appear.The image shows the group that can be edited:
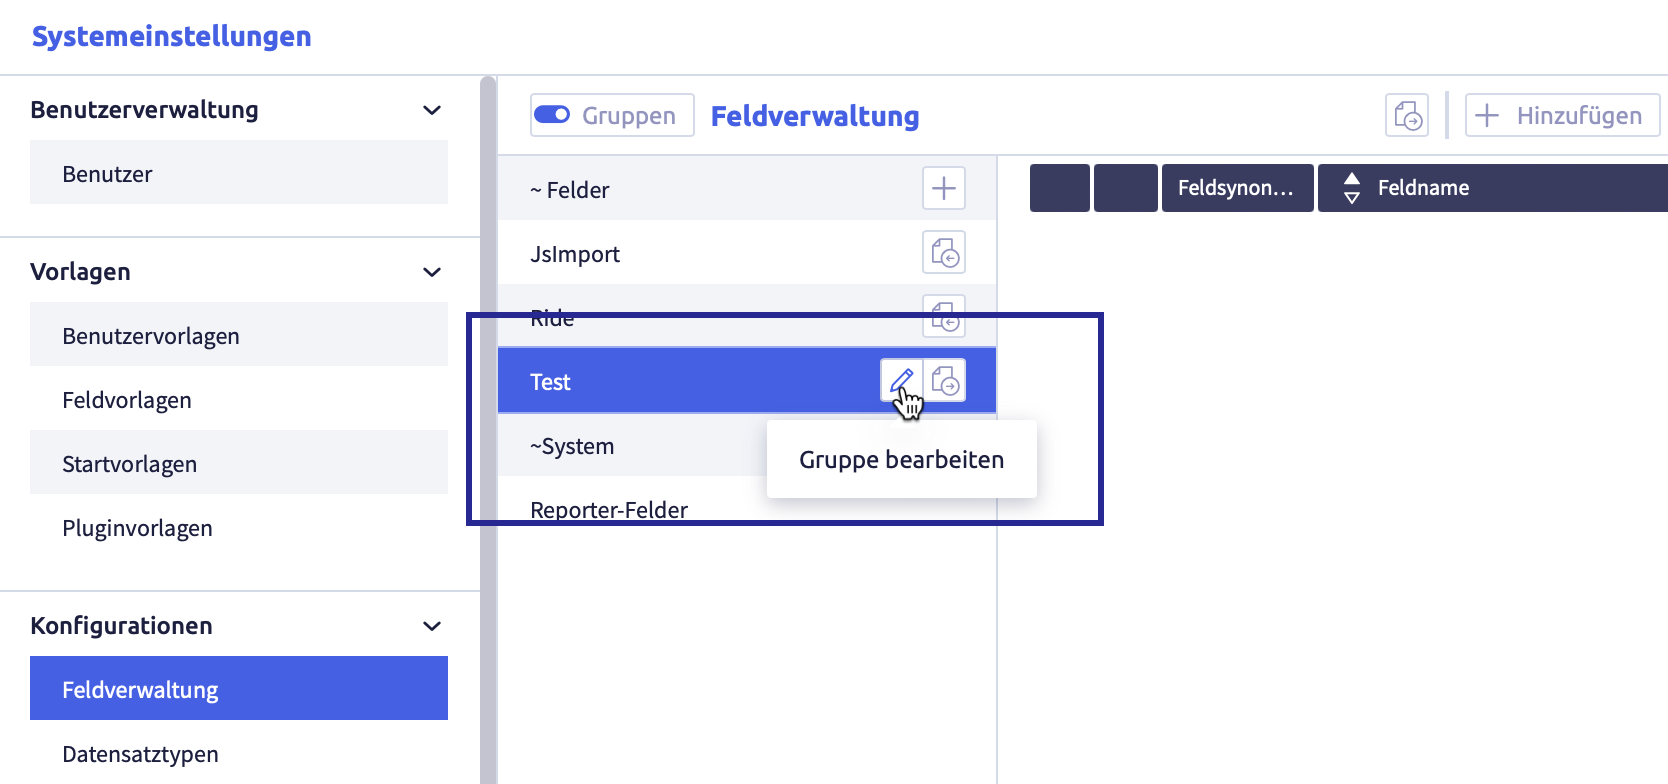
-
click the button Edit
The element can be edited or deleted.
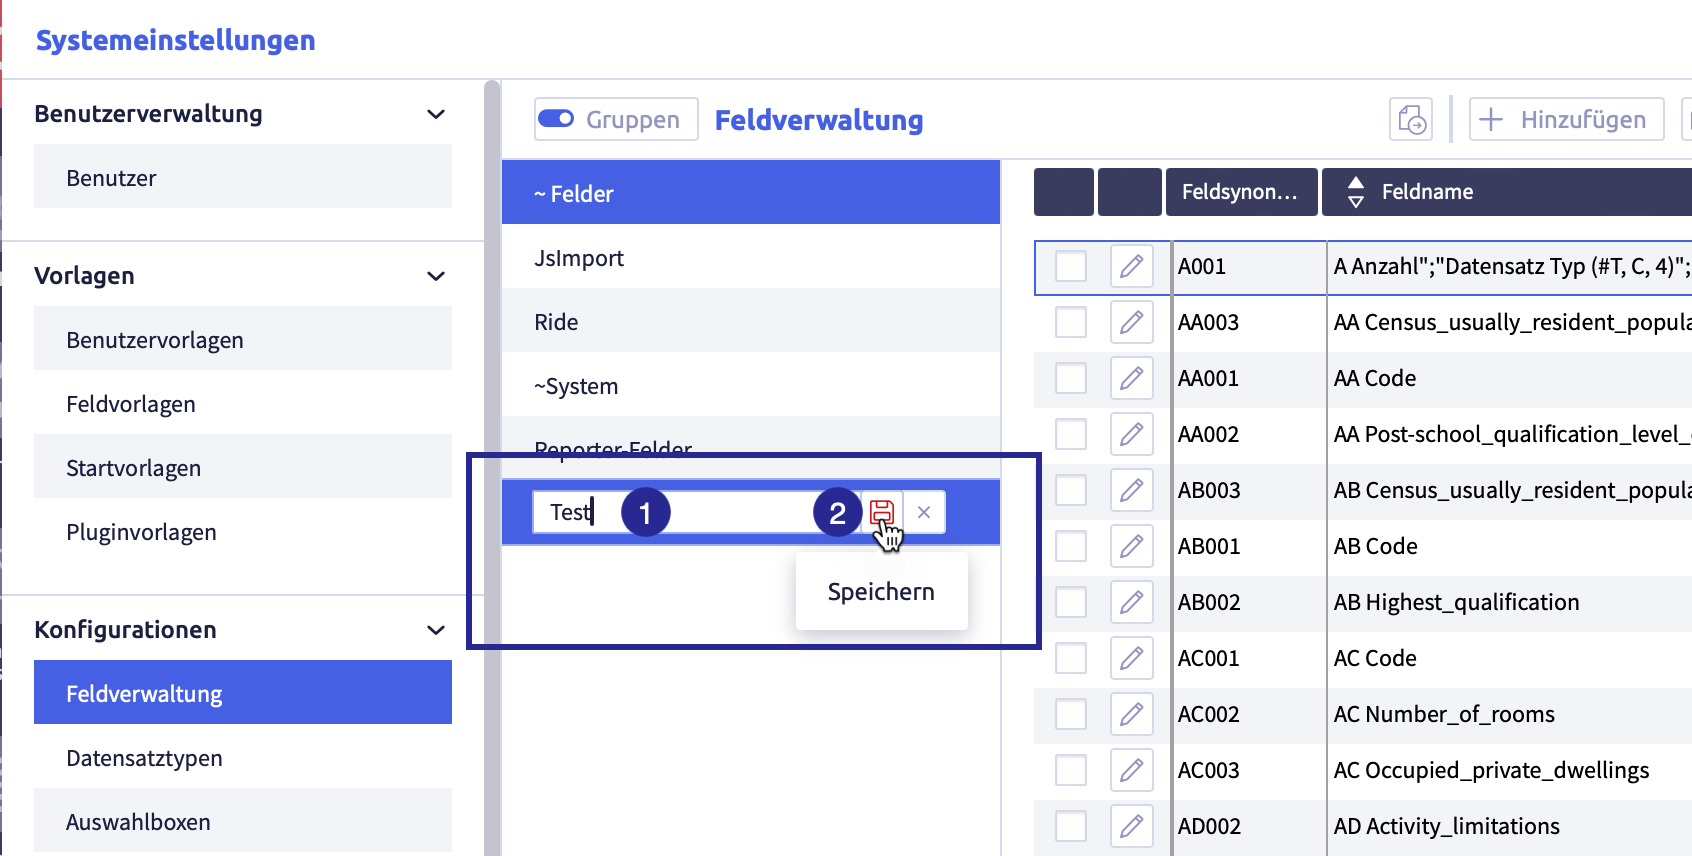
The image shows the edit possibilities of the group:
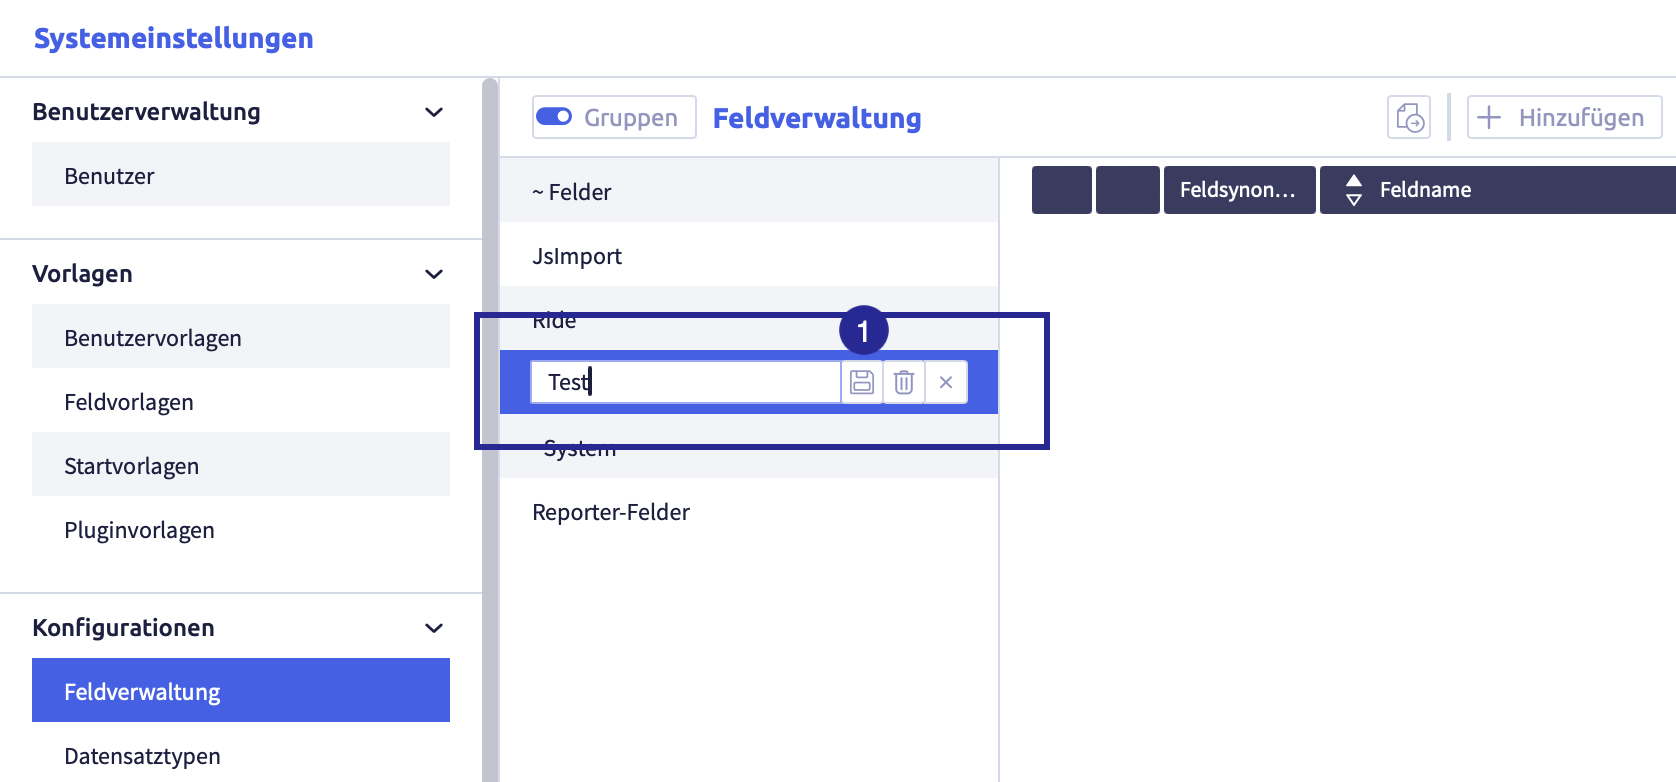
-
edit the group name
-
click the button Save
(or Cancel)The list with the group names will be updated, the group has been sorted alphabetically.
Delete a group
-
click the group you intend to edit
The button Edit
will appear.The image shows the group that can be edited:
-
click the button Edit
The element can be edited.
The image shows the edit possibilities of the group:
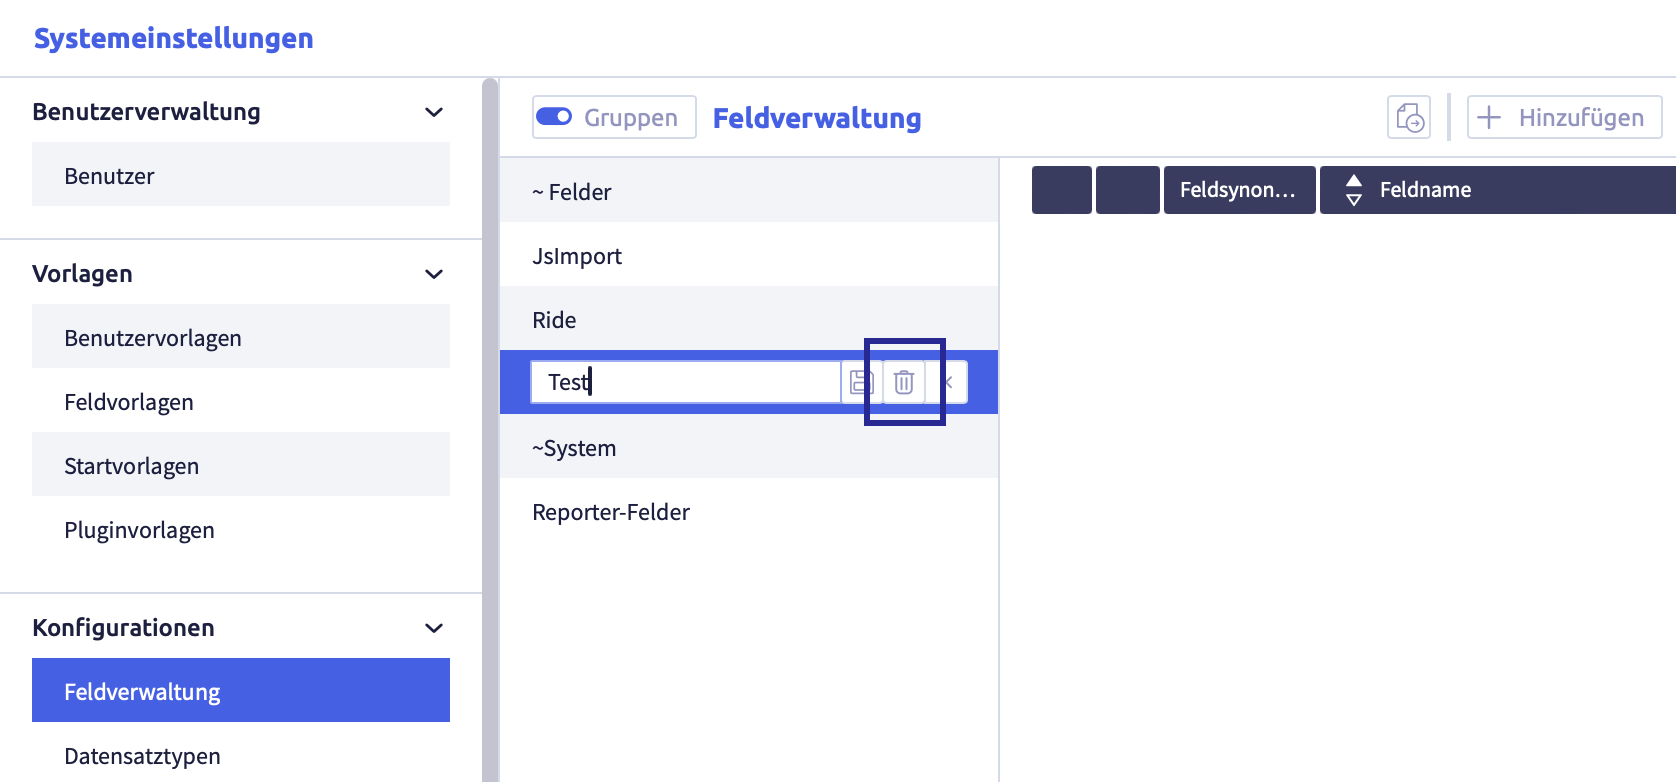
-
click the button Delete
The following confirmation window opens:
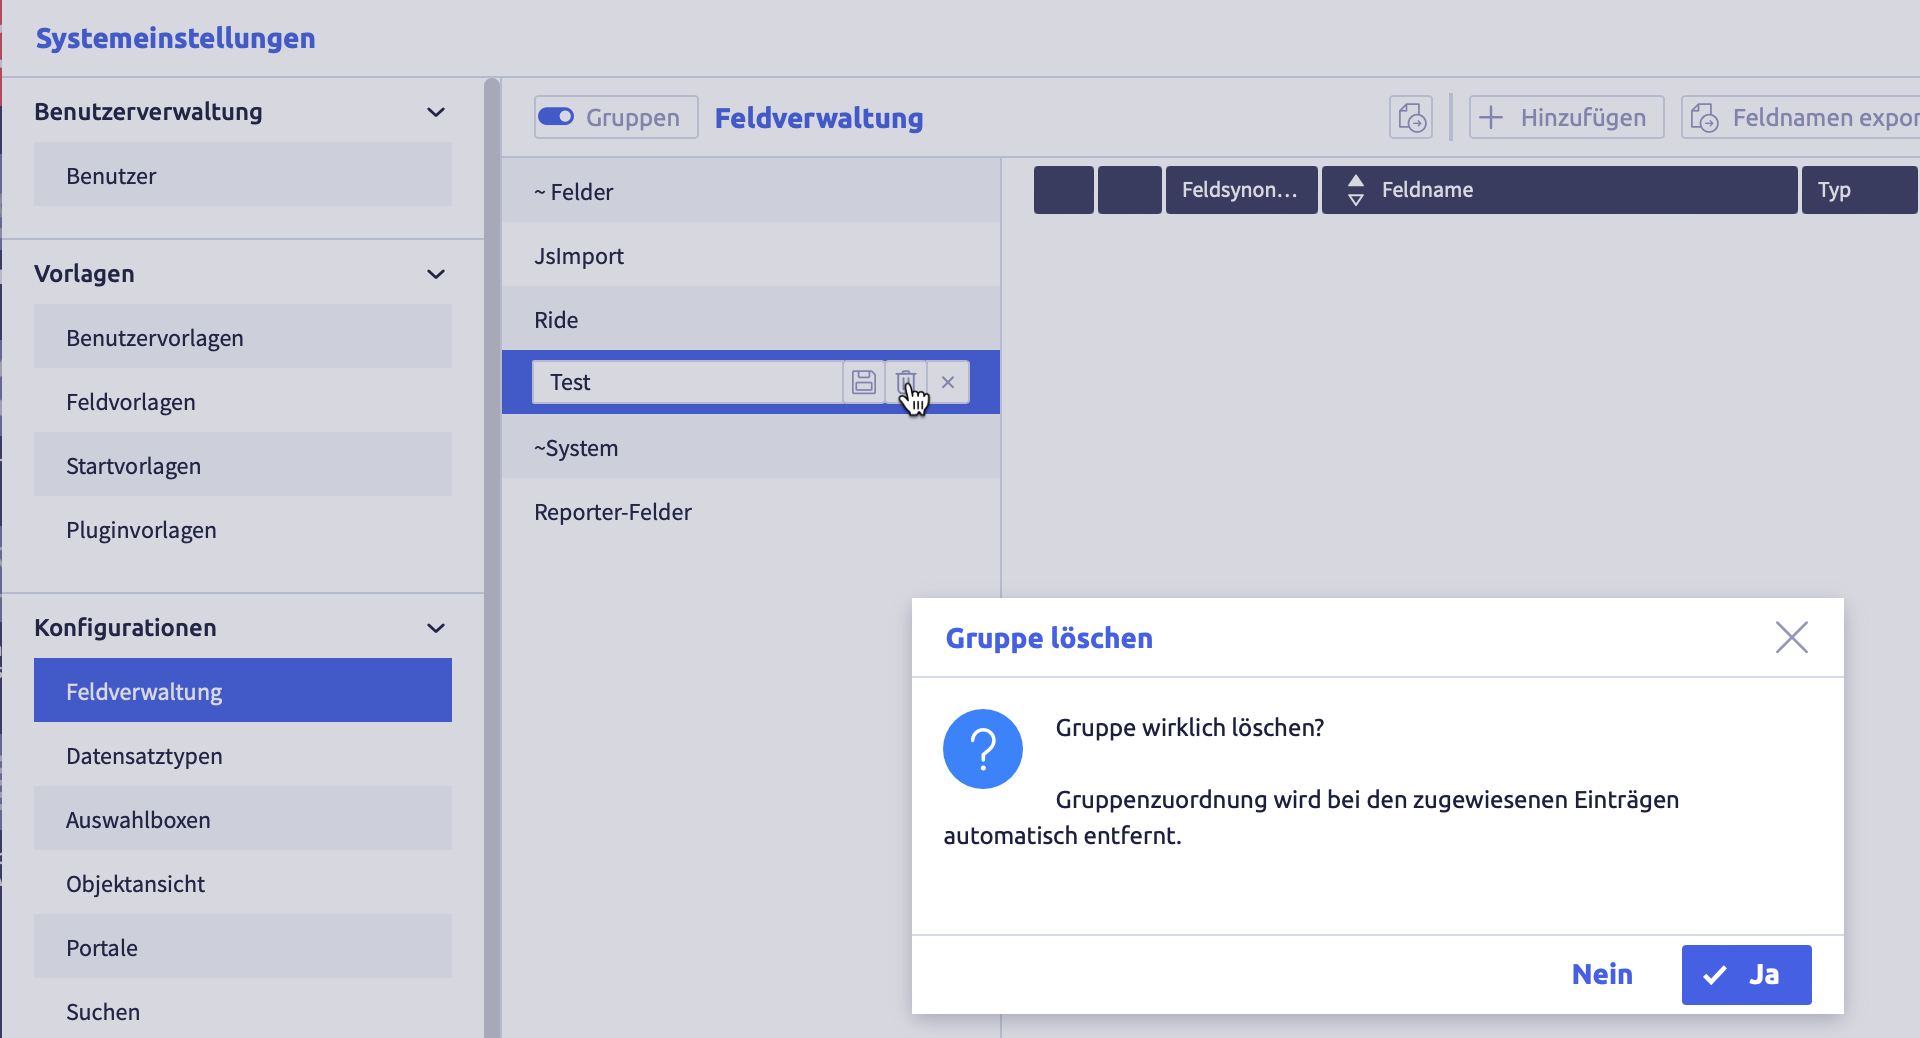
-
click the button Yes (or No)
The group will be deleted and the list of groups will be updated.
Links of elements to this group are automatically deleted.
Add elements to a group
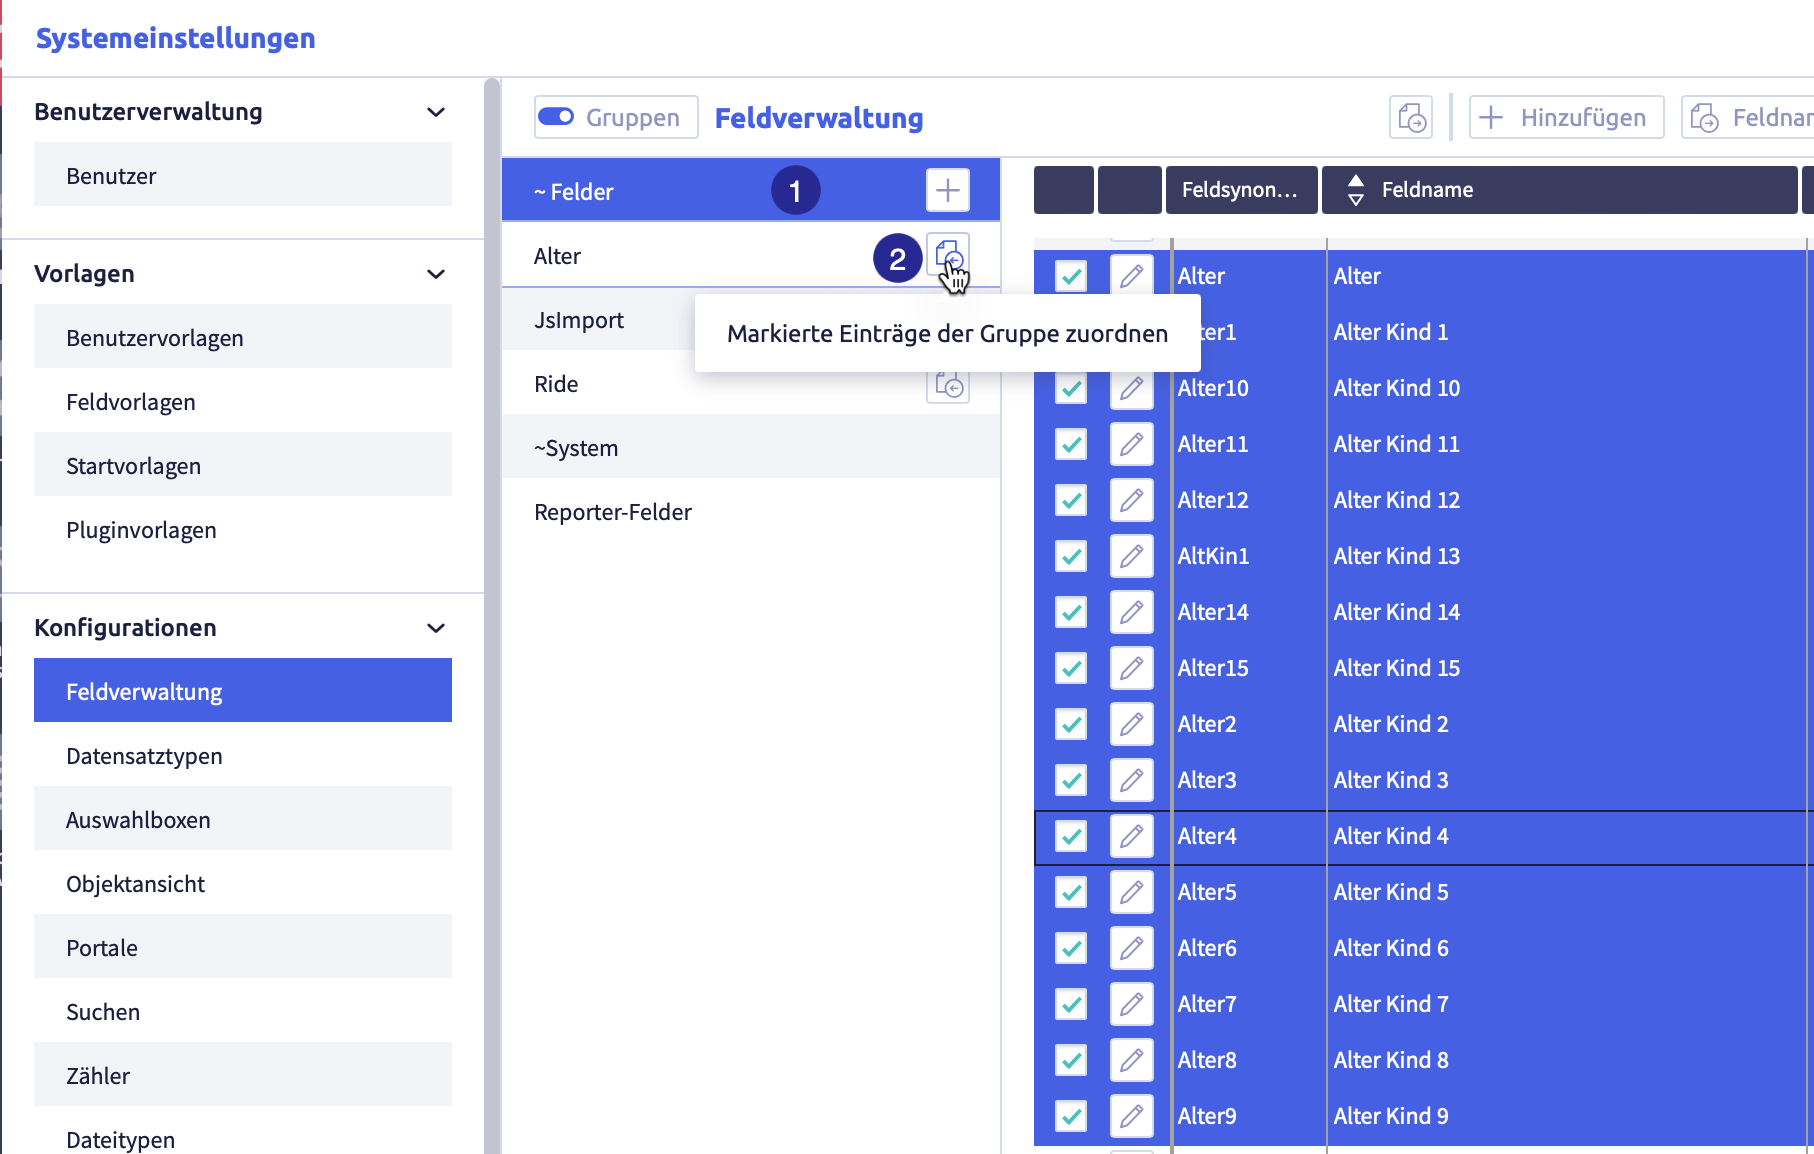
(1) selected group with selected elements you want to add to another group, (2) button Assign selected entries to the group
-
select a group from which you want to add elements to another group
-
select all the elements you want to add to the group
-
click the button Assign selected items to group
of the new groupThe elements are added to the group.
An element can belong to several groups.
Remove elements from a group
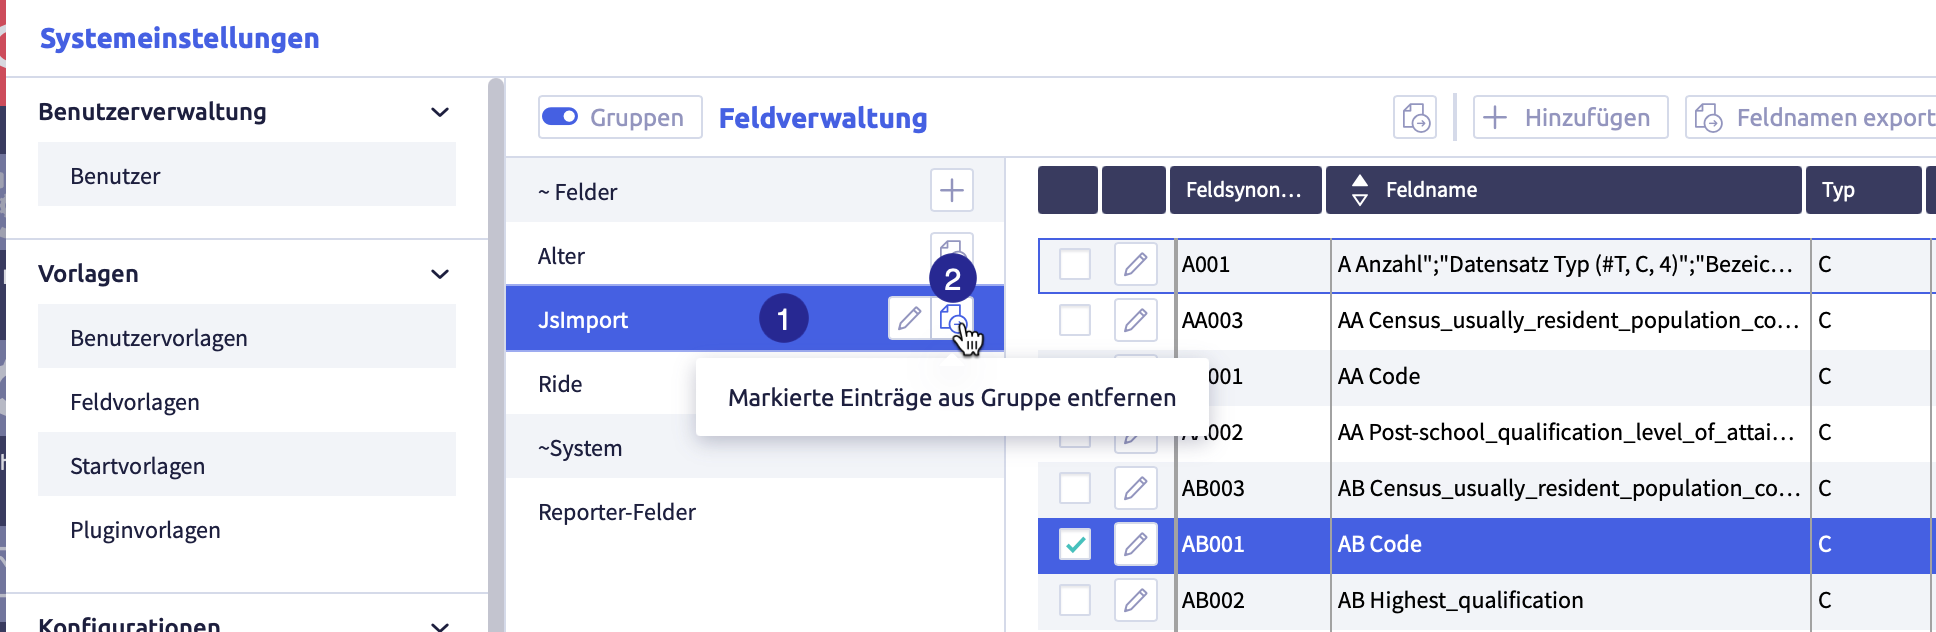
(1) selected group with selected elements to be removed from the group, (2) button Remove selected entries from group
-
click the group from which you want to remove elements
-
select all the elements you want to remove from the group
-
click the button Remove selected items from group
of the groupThe elements will be removed from the group.
Export and import field templates
The following exports and imports are possible for field templates:
Each export is only carried out for selected rows in the list of field templates.
Image with buttons for export and import
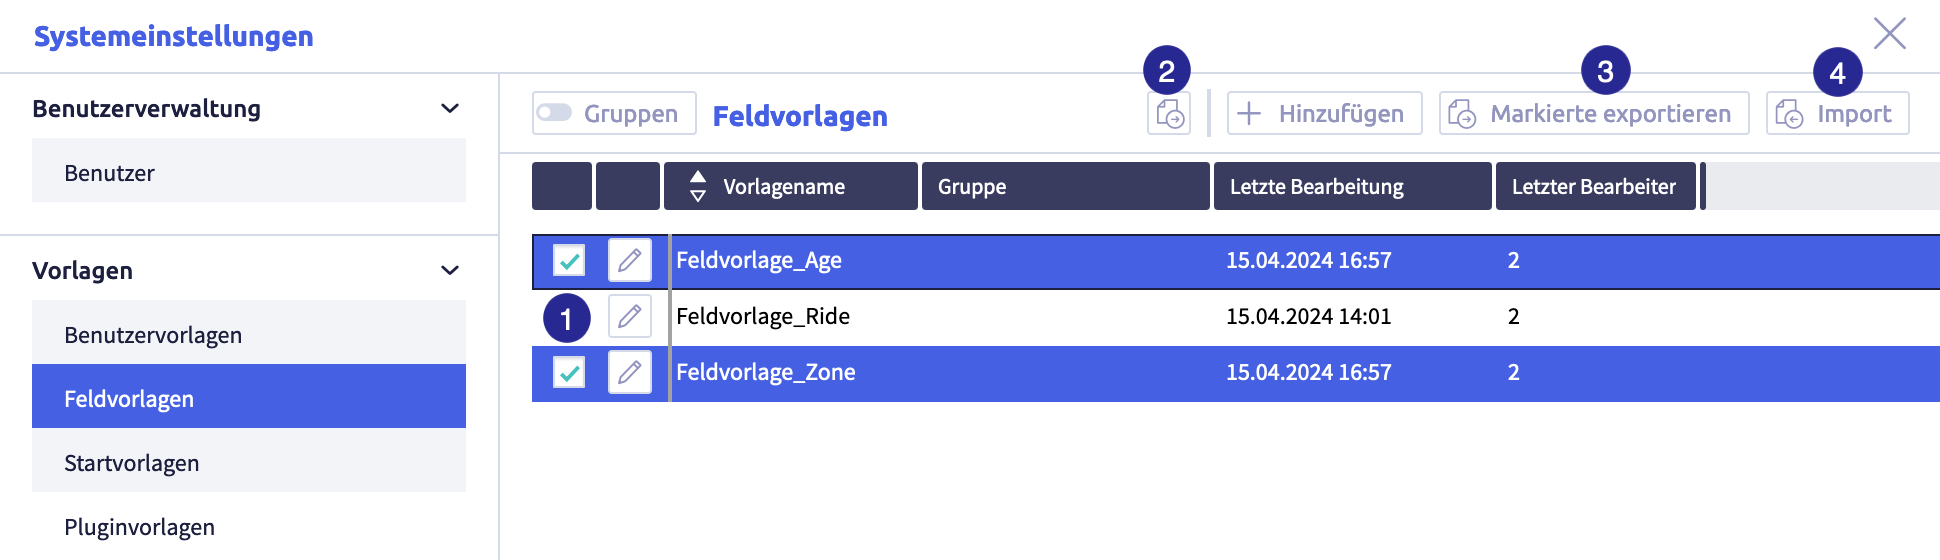
The image shows the export and import buttons: (1) checkbox to select row, (2) button Export selected data as CSV
Export selected data as CSV file
Image with buttons for export and import
The image shows the export and import buttons: (1) checkbox to select row, (2) button Export selected data as CSV
-
select the rows you want to export
-
click the button Export selected data as CSV
The CSV file will be downloaded and saved in the download folder (or the folder that was set for it in the browser).
The file name will be generated automatically and will be called #Field templates.csv.
A list with the following information will be exported:
| Column | Meaning | Note |
|---|---|---|
| template name | name of the field template | |
| group | name of the group(s) of the field template | |
| last edit | time of last edit | |
| last editor | user ID of the last editor |
Export selected templates
Field templates that have been exported in this way can be imported back into a CortexEngine.
Image with buttons for export and import
The image shows the export and import buttons: (1) checkbox to select row, (2) button Export selected data as CSV
-
select the rows you want to export
-
click the button Export selected.
The following window opens:

A .tar file will be downloaded and saved in the download folder (or the folder that was set for this in the browser).
The file name will be generated automatically.
Import templates
Exported templates from another CortexEngine can be imported into the current CortexEngine using the Import button.
Image with buttons for export and import
The image shows the export and import buttons: (1) checkbox to select row, (2) button Export selected data as CSV
-
click the button Import
The following window opens:
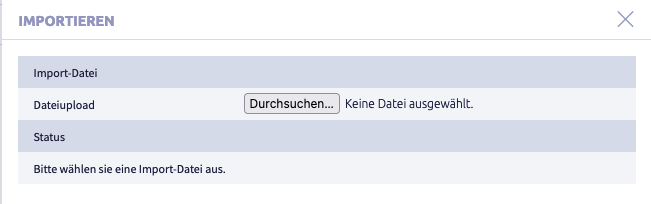
-
click the button Select file
A window with a file folder opens.
-
select a file
The following formats are suitable for import:
- .tar
- .tar.gz
- #Vfd.ctxexp
-
click the button Import
The following window opens (as an example: importing a .tar file):

-
click the button Close.
The list with all field templates will be displayed again.