Select boxes

Select boxes define lists of values that will be made available in dropdown input elements.
These can be referenced in record types in the field configuration of fields with the display type Select box.
Warning
- Changes in system settings often only take effect when a restart is carried out after closing the system settings (menu item under the button with the user name at the top right, see also introduction).
- If another user with admin rights is currently editing this system setting, the red icon lock
 appears in the header and a warning message appears with the name of the currently active user.
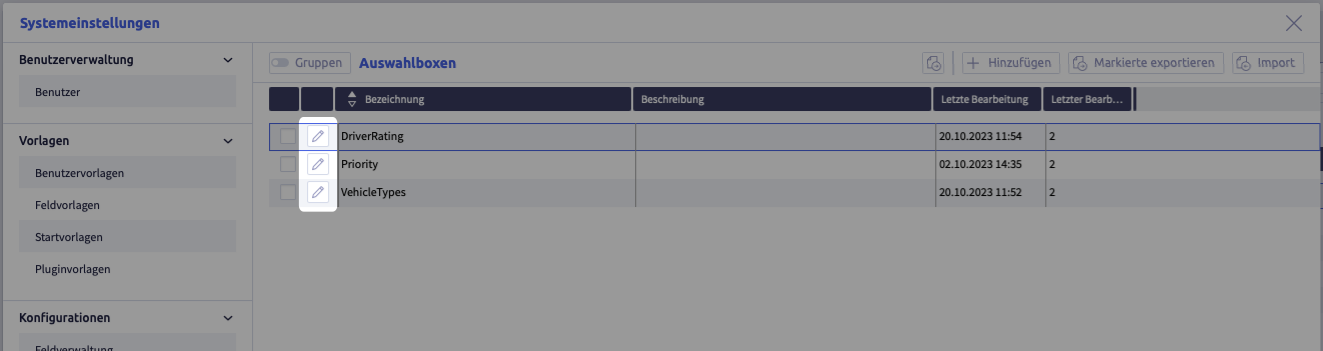
Add a select box

A new select box definition can be created by clicking the button Add ![]() above the list.A new select box definition can be created by clicking the button Add
above the list.A new select box definition can be created by clicking the button Add ![]() above the list.
above the list.
The select box editor opens.
Alternatively, you can use the button Add ![]() in the select box editor:
in the select box editor:

Edit a select box
-
click the button Edit
 to edit a file type definition
The select box editor opens.
-
alternatively, a select box can be selected for editing with the button Load select box
 in the select box editor:
Delete a select box
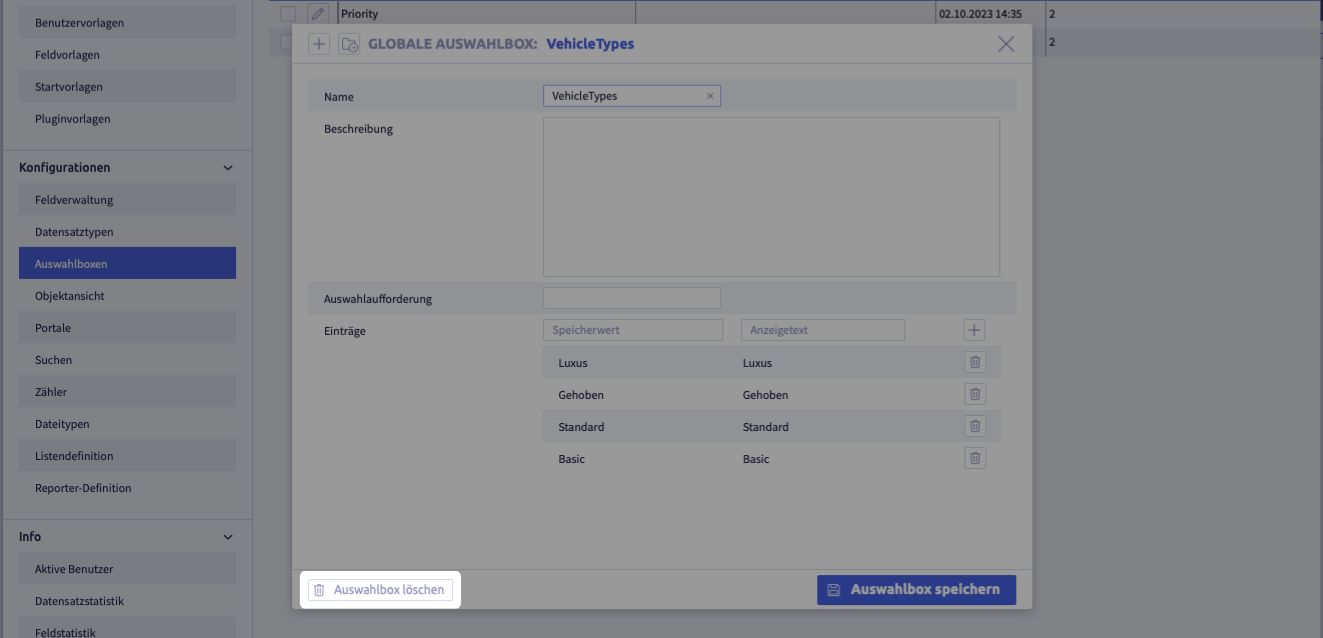
Use the button Delete ![]() in the select box editor footer to delete a select box.
in the select box editor footer to delete a select box.
Warning
The button Delete ![]() is not available if the select box definition is being used in a field with the display type Select box!
is not available if the select box definition is being used in a field with the display type Select box!
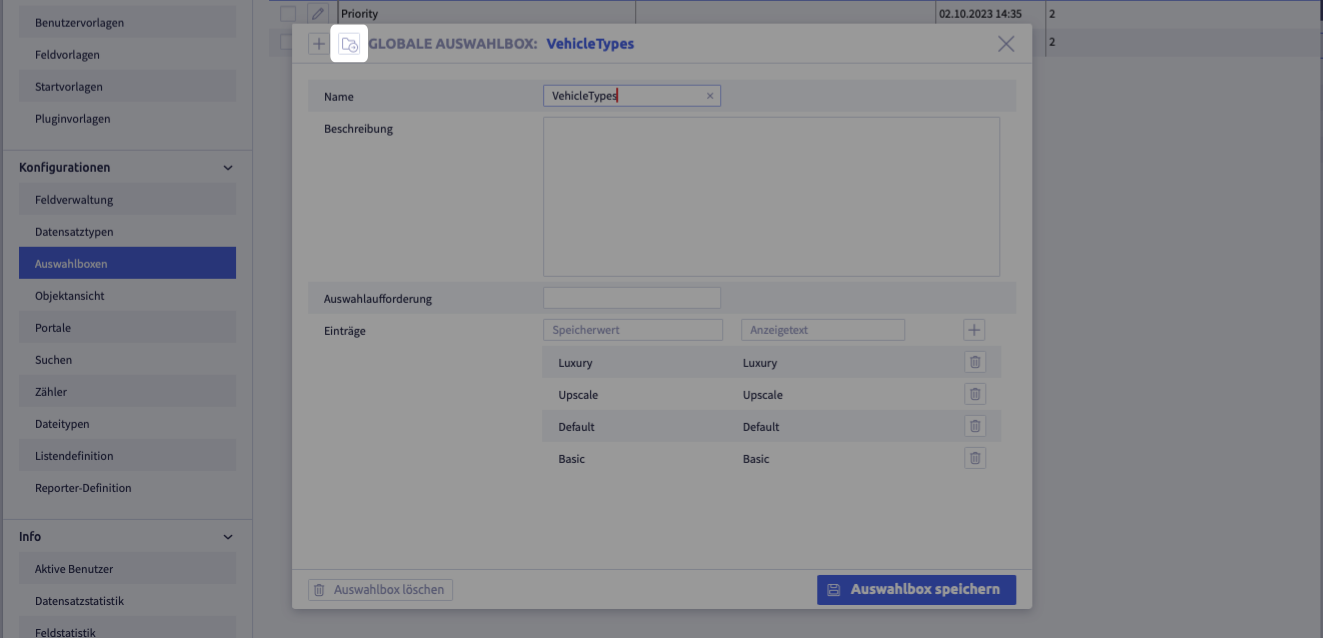
Select box editor

Select boxes can be edited with the select box editor.
Name
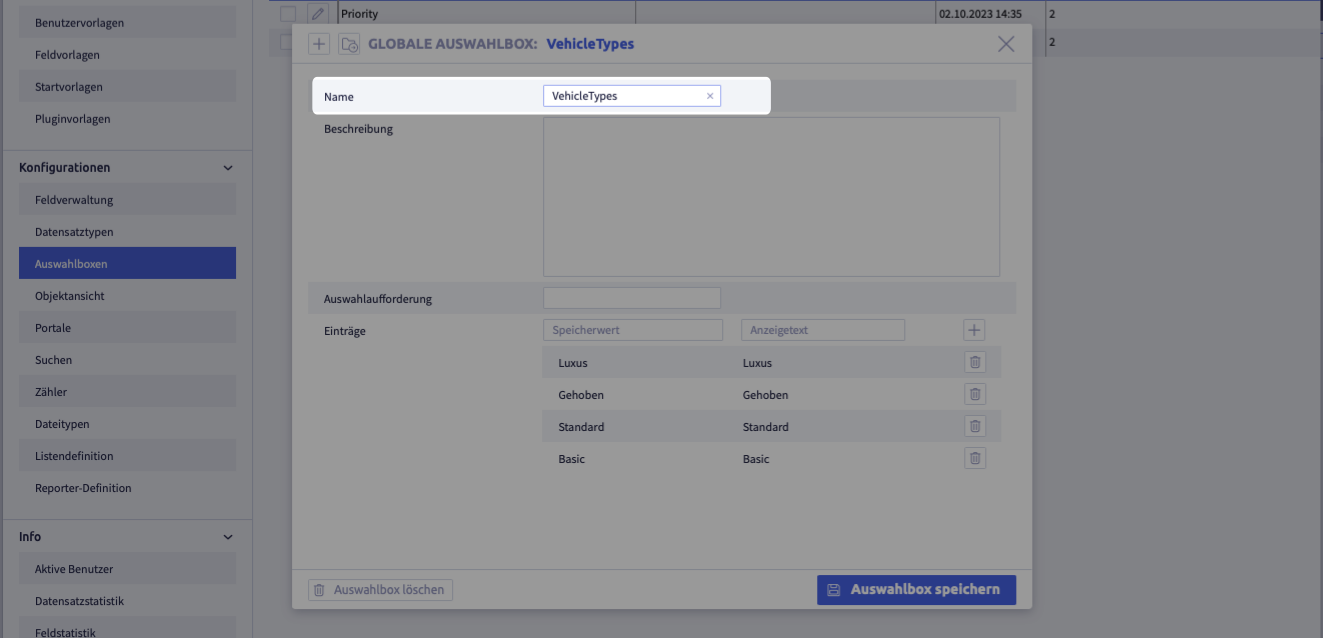
Name with which the select box itself is offered for selection at the display type Select box. Please choose a meaningful name.
Description

Here, you may write your further description of the select box.
Request for selection
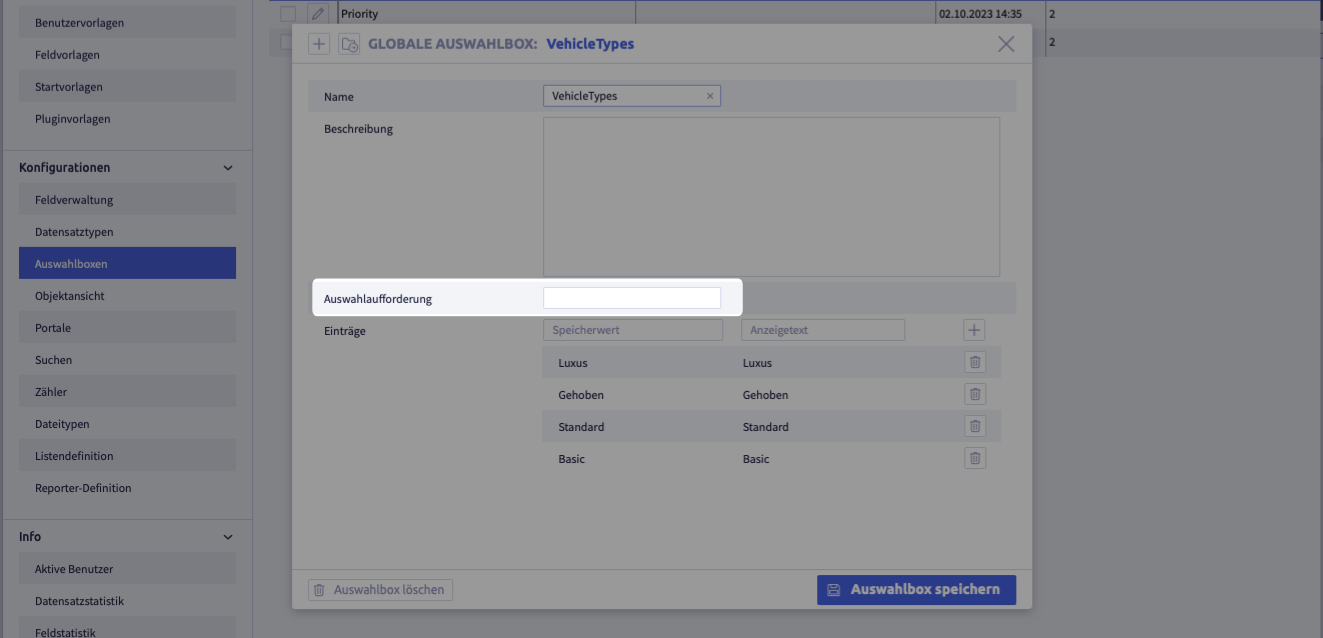
Text to be displayed in the input element if no value has been selected.
Note
If this field remains empty, - Please select - is displayed by default.
Entries
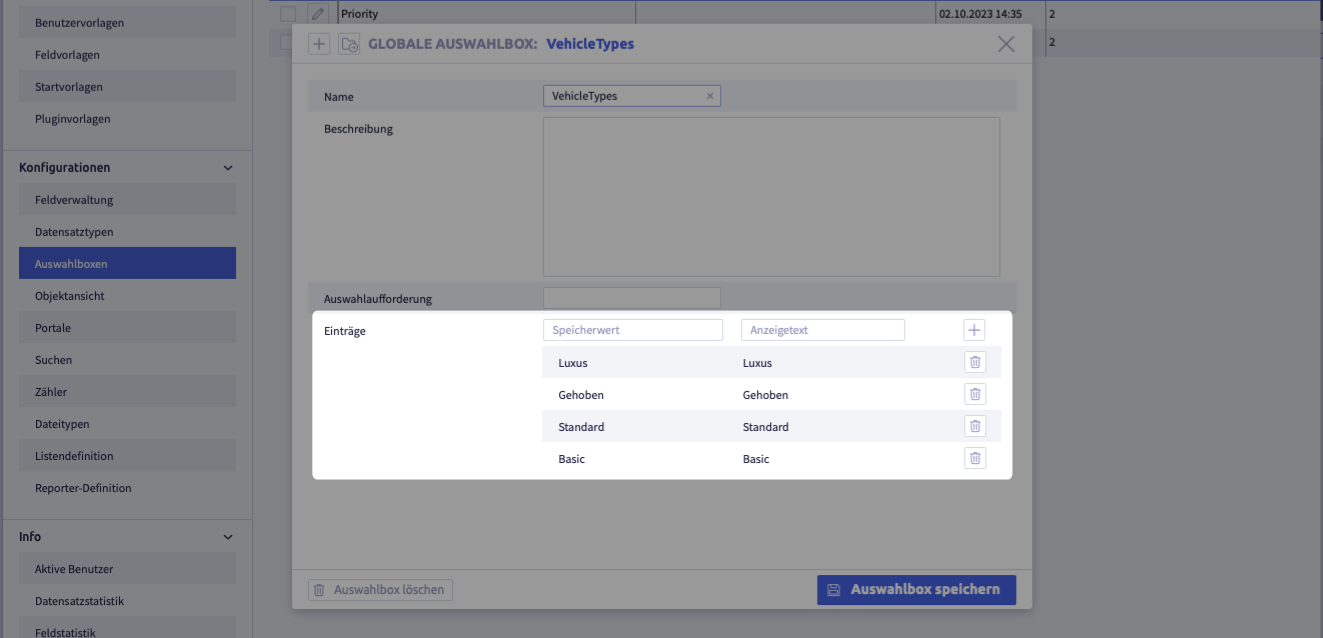
The actual values available for selection in the select box.
Add an entry
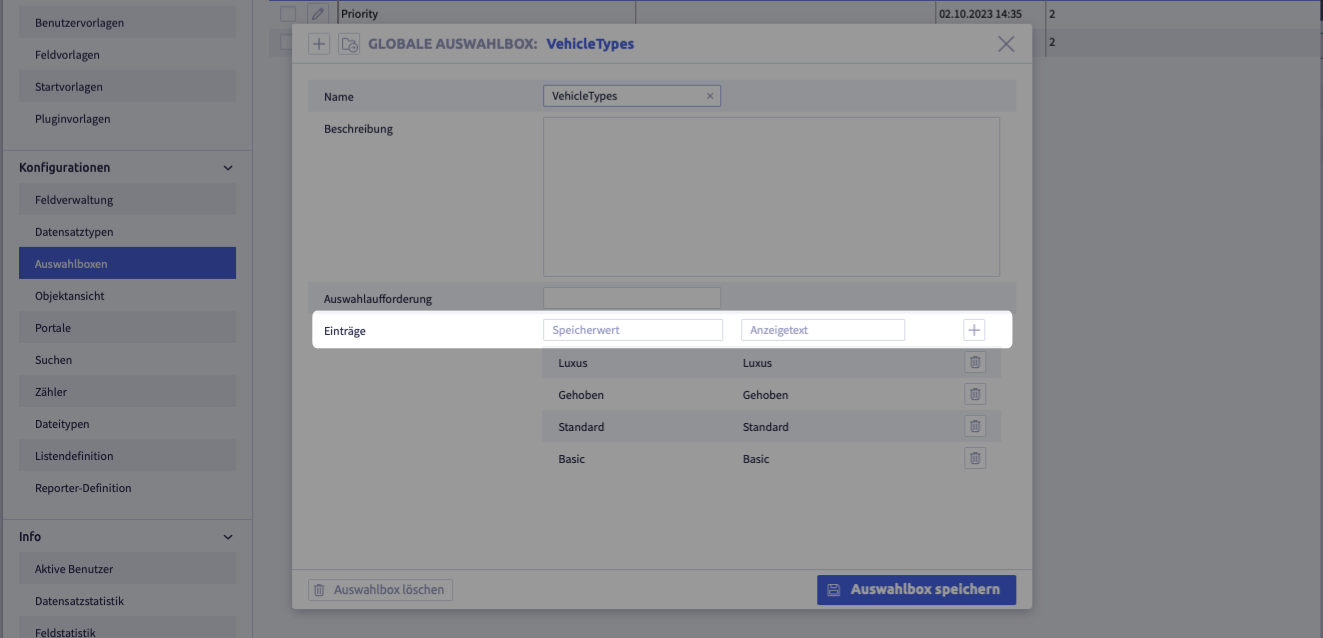
The value to be saved on selection is entered under Saved value and the value to be displayed to the user is entered under Display text. The button Add ![]() adds a new entry to the list.
adds a new entry to the list.
Delete an entry

Individual entries can be removed from the list using the button Delete ![]() .
.
Edit an entry
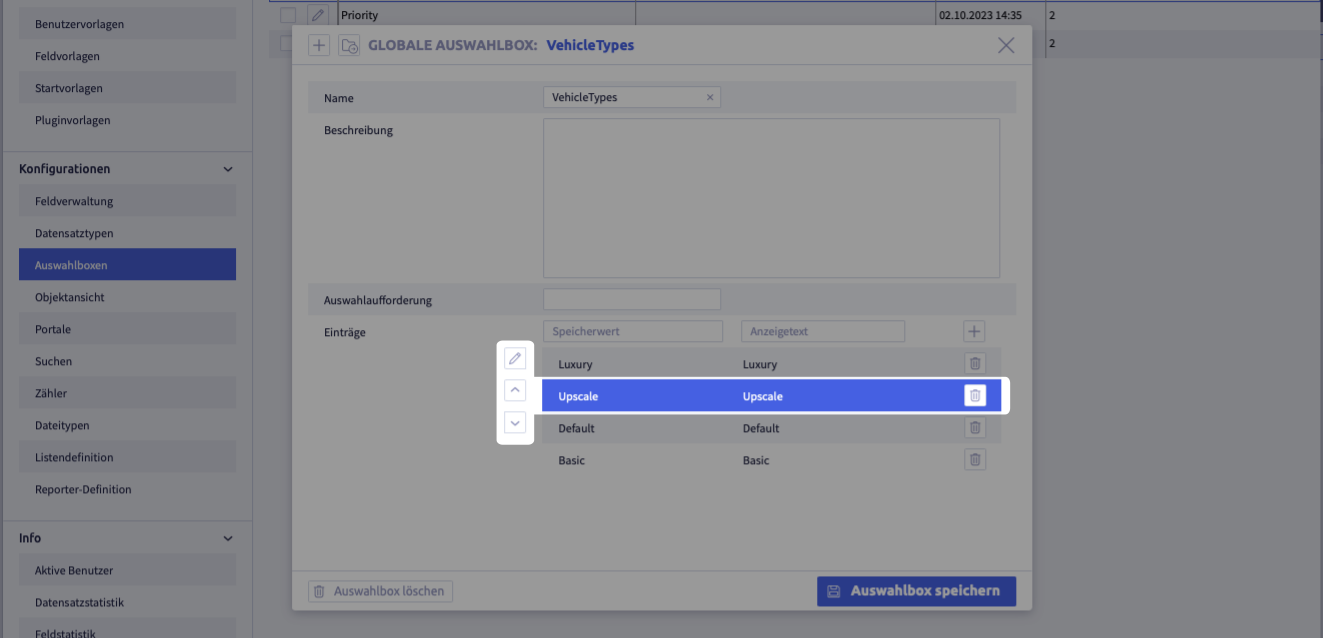
Clicking on an entry displays its editing options:
- The button Arrow up
 sorts the entry one position up.
 - The button Arrow down
 sorts the entry one position down.
 - The values of the entry can be changed using the button Edit :
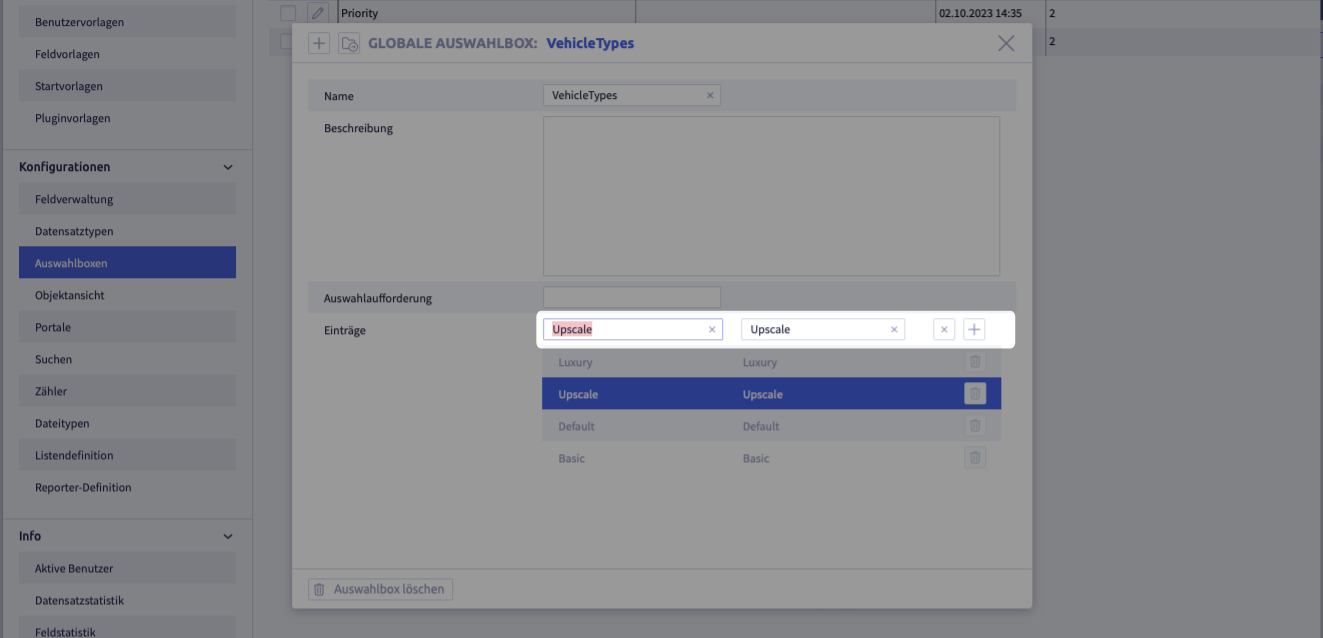
The button x discards and the button ![]() accepts changes made to the values.
accepts changes made to the values.
Attention
Changes made are only persisted by the button Save select box! (This is not visible while the entry is being edited).
Export and import select boxes
The following exports and imports are possible for select boxes:
Each export is only carried out for selected rows in the select box list.
Image with buttons for export and import
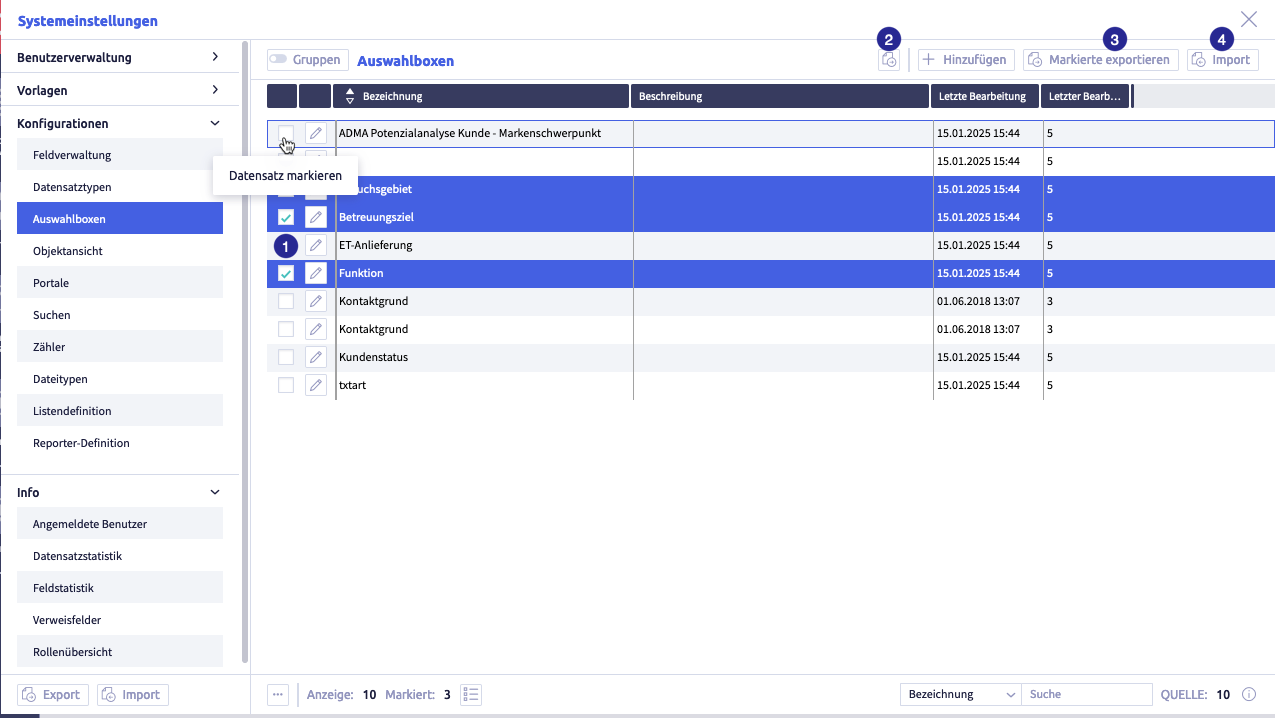
The image shows the export and import buttons: (1) checkbox to select row, (2) button Export selected data as CSV
, (3) button Export selected
Export selected data as CSV file
Image with buttons for export and import
The image shows the export and import buttons: (1) checkbox to select row, (2) button Export selected data as CSV
-
select the rows you want to export
-
click the button Export selected data as CSV file
The CSV file will be downloaded and saved in the download folder (or the folder that was set for this in the browser).
The file name will be generated automatically and will be called #Select boxes for record types.csv.
A list with the following information will be exported:
| Column | Meaning |
|---|---|
| name | name of the select box |
| description | description of the select box |
| last edit | date of last editing |
| last editor | user ID of the last editors |
Export selected configurations
This export includes the configurations of the selected entries.
Search configurations exported that way can be imported back into a CortexEngine.
Image with buttons for export and import
The image shows the export and import buttons: (1) checkbox to select row, (2) button Export selected data as CSV
-
select the rows you want to export
-
click the button Export selected
The following window opens:

A .tar file will be downloaded and saved in the download folder (or the folder that was set for this in the browser).
The file name will be generated automatically.
Import configurations
Selected exported configurations from another CortexEngine can be imported into the current CortexEngine using the button Import.
Image with buttons for export and import
The image shows the export and import buttons: (1) checkbox to select row, (2) button Export selected data as CSV
-
click the button Import
The following window opens:
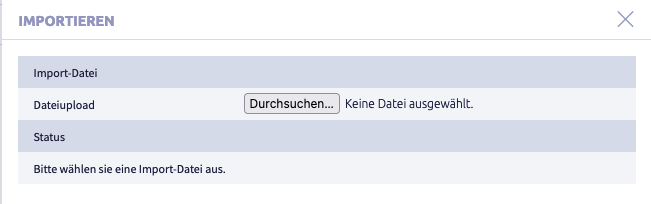
-
click the button Select file
A window with a file folder opens.
-
select a file
The following formats are suitable for import:
- .tar
- .tar.gz
- #Sbx.ctxexp
-
click the button Import
The following window opens:
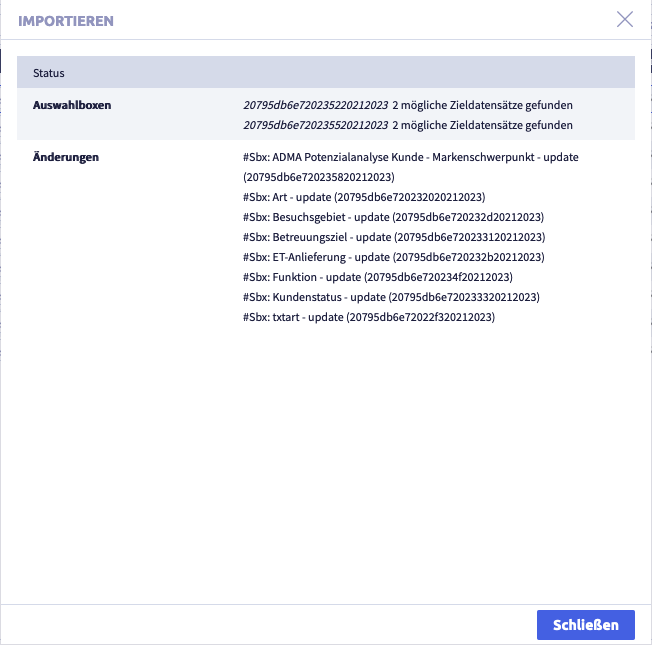
-
click the button Close
The list in Select boxes will be displayed again.