Portals
Portal - definition
A portal uses filter functions allowing the user to create an individual selection of records that is customized to the attributes of their records and precisely meets their needs.
By specifying various filter criteria, the user can determine the desired subset from the entire data inventory. The result files are determined by the portal and can then be displayed in lists.
A portal offers the possibility for regularly recurring selections and for the management of workflows. The flexibility to change records over time and adopt different states means that they can be effectively routed through the various selections in the portal. An example of this would be the assignment and management of tasks to different employees.
Create a portal
Example: TaxiDB (SE)
Call up a record
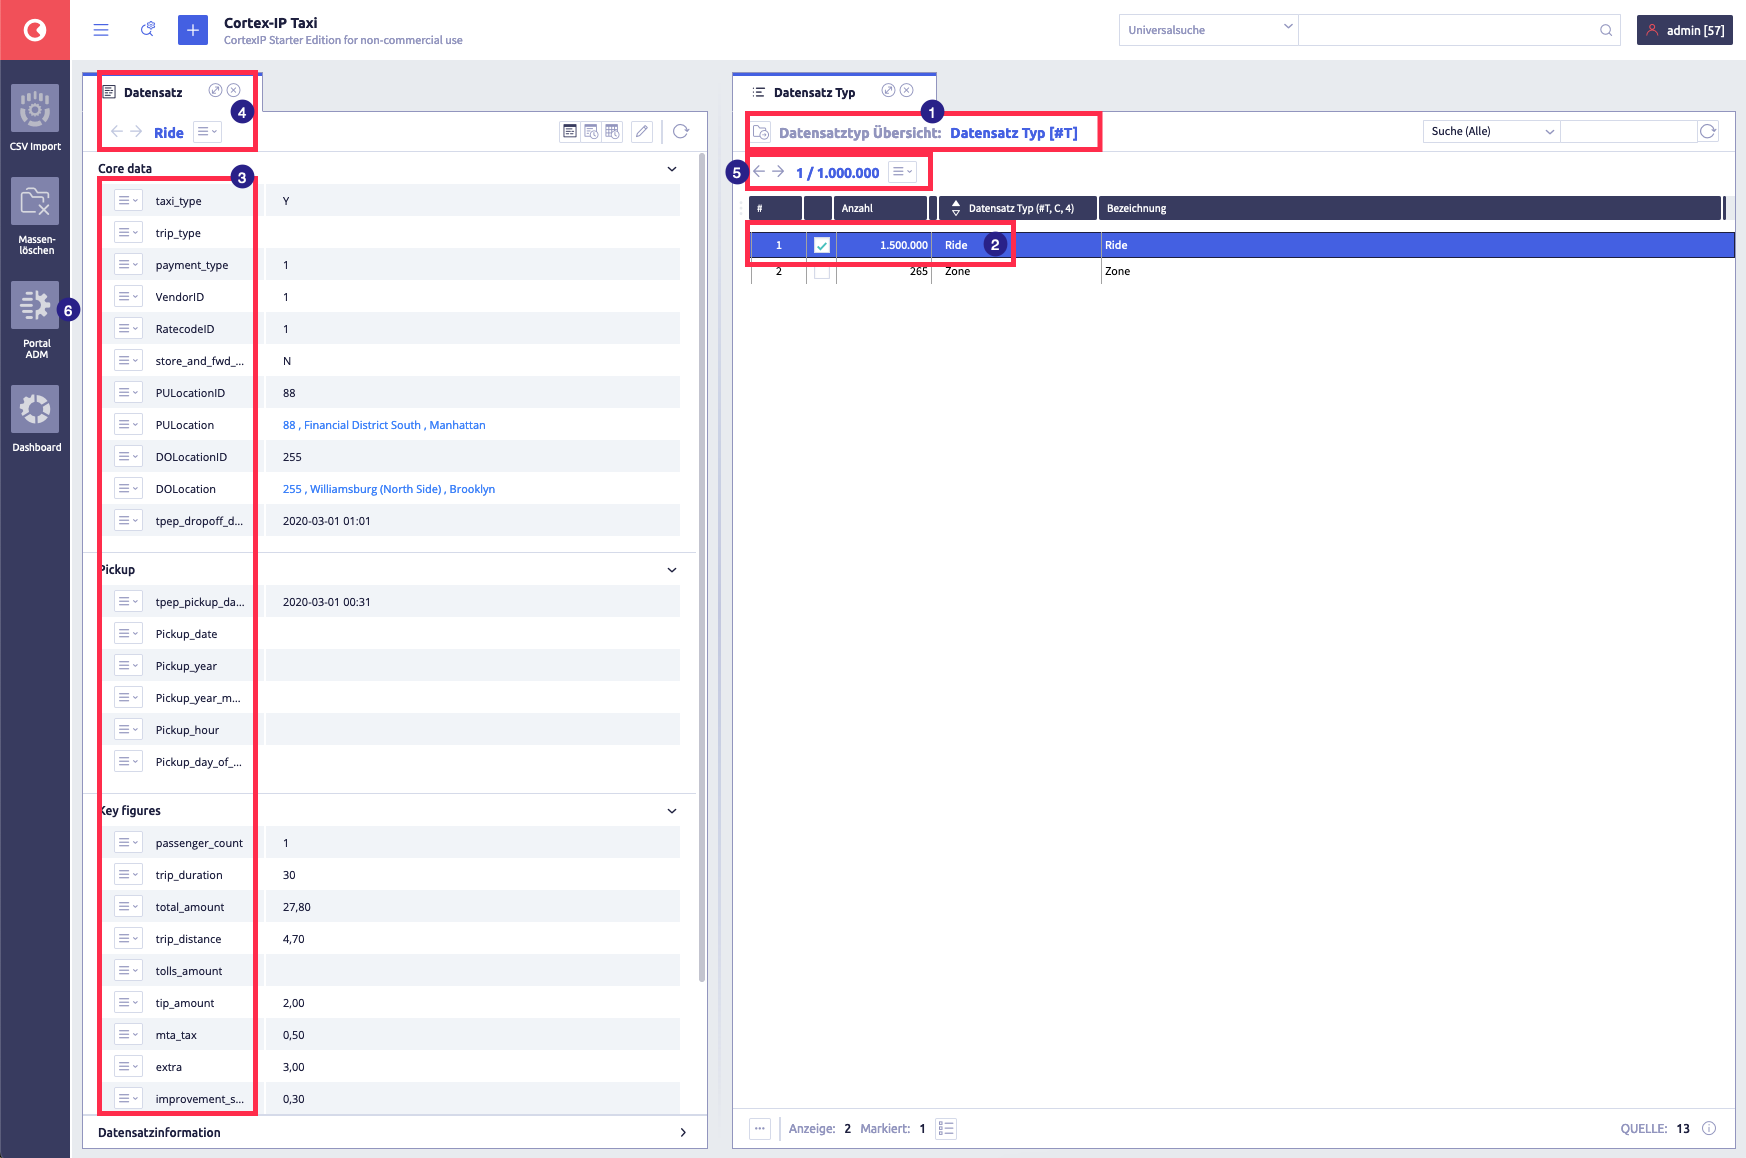
The image show the tabs Record (left) and Record Type (right)
- select a record type (2) from the record type overview (1) (in this example: Ride)
- in the left tab, (3) the display of all attributes for the first (5) record of the record type Ride (4) will open
- further records can be selected using the arrow buttons (5)
- call up portal admin (Portal ADM) (6) in the sidebar
Portal admin

The image shows two different possibilities of how the portal admin can appear depending on the state of your configuration.
- on the right a second tab will open
- click the button Close
 to close the window Load portal configuration
 -
click the button
 (in the tab on the left)
The window Create new portal opens.
-
enter a name for the portal
- select a time under auto. Update as needed
-
confirm with Ok
Save
From point 4 on, you can save the name and selection with the button Save portal
 at any time.
Add a group
-
click button Add new group
(in the tab on the right) - a window opens -
assign a group name and confirm with Ok
-
add a group row by clicking the button Add a group row

-
click button Select display list
- or leave it blank -
add description and select advanced settings - or leave blank and confirm with Ok
-
create rule within the portal row
-
select a field from the list (Ride [Ride]) -> a screen will open
-
select the desired field by clicking on it and confirm with Confirm selection.
Portal row
The parameters for the selection are defined within a portal row:
- any field within the data inventory can be accessed
- a selection can be made in combination with other fields
-
there are three selection options
- simple: fixed values or variable search with *
- selected terms: each separated by , and if necessary with *
- range: from....to.... can be specified
Field selection
After entering the group row, a configuration is required. This selects one or more data fields that form the basis for the evaluation. Any existing field in the data inventory can be used for this: both those defined by the user and existing system fields.
The content of the field can now be compared with predefined values, determining the validity of the field content. You can also use the button Expansion to create a link to a field of the type Internal reference. You select the fields and can also use certain record types for limitation.
Note
You also have the option of using System fields in the field selection. Please note that the use of the Record type field (synonym: #T) is only suitable for making a selection for small amounts of data. Ideally, you should avoid using this field.
Search for fixed values and with wildcards
Select box ab*
After you have selected a field under Field identifier, enter a value selection. For example, the value 1. This will restrict the selection to all records that contain a 1 in this field.
Search based on enumerations
Select box a, b, c
This area enables the selection of multiple values. It is an or link in which the records that contain one of the values in the selected field will be selected.
Search using value ranges
Select box a...c
Selection is possible here using a Value from / Value to range. For example, for date values with a beginning and ending date.
Please note that decimal values (floating point numbers) are handled separately. These can only be found by using from/to ranges and not by a simple selection.
Note
When selecting date values, you can use variable specifications that apply based on the current or specified date. For example, a selection via "-2ws" for the beginning of the week from two weeks ago would be possible.
The table shows the available variables for date values:
| Abbreviation | Meaning | Note |
|---|---|---|
| y | year | |
| m | month | Example: -2m = today 2 months ago, +3m = today in 3 months |
| ms | start of the month | |
| me | end of the month | |
| w | week | |
| ws | start of the week | Example: -2ws = start of the week from two weeks ago |
| we | end of the week | |
| d | day | |
| q | quarter | |
| qs | start of quarter | |
| qe | end of quarter | |
| ys | start of the year | |
| ye | end of the year | |
| yd | yesterday | only single, i.e. valid without number |
| td | today | only single, i.e. valid without number |
| tm | tomorrow | only single, i.e. valid without number |
Apply a portal
- call up the option Portal
 using the burger button
  once you have recreated your portal
 - click the button Load portal

- select your newly created portal
In a currently open portal, the results can be recalculated at any time.
To do this, click the button (Refresh portal) ![]()
Edit a portal
Edit and change a portal
-
select PortalADM
The window Load portal configurations opens.
-
click the button Select portal
next to the portal name you requireRepeat step 2 if you want to change the portal.
-
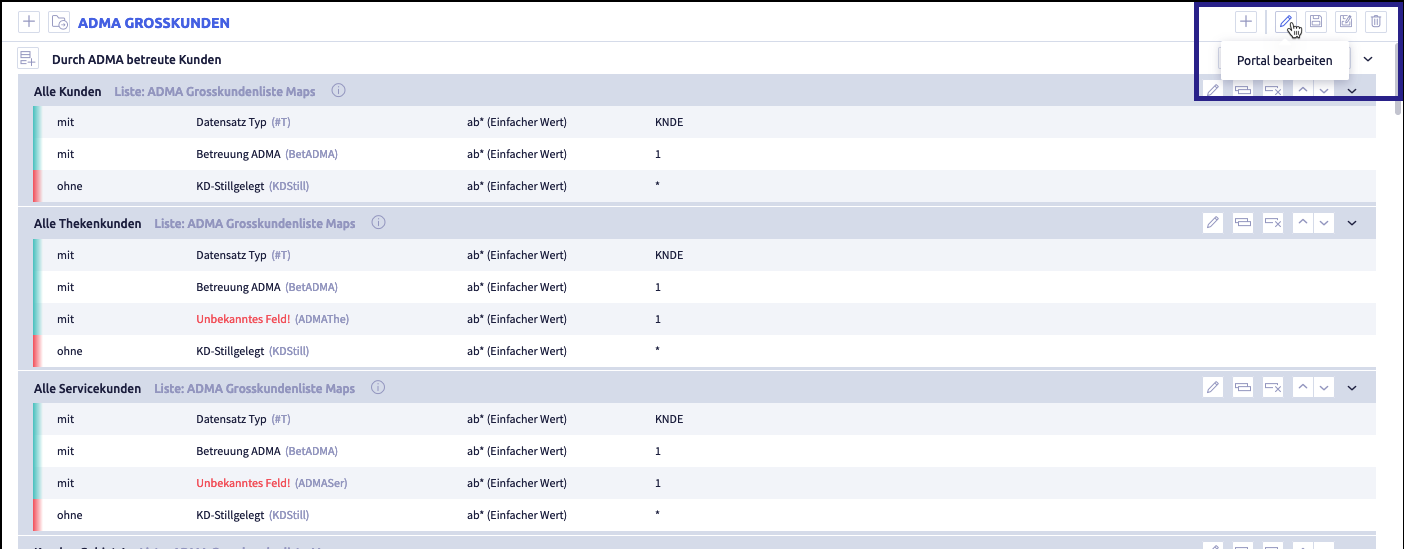
click the button Edit portal

The image shows where you find the button Edit
:
The following window opens:
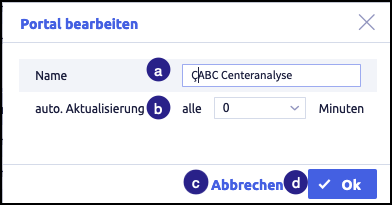
The image shows the possible actions you can take
- change the name
- edit the automatic actualization
- cancel
- confirm
-
confirm changes with OK
Your edits will be saved.
Delete a portal
-
select PortalADM
The window Load portal configurations opens.
-
click the button
next to the portal name you require -
click the button Delete portal

The image shows where you find the button Delete
:
The following window opens:
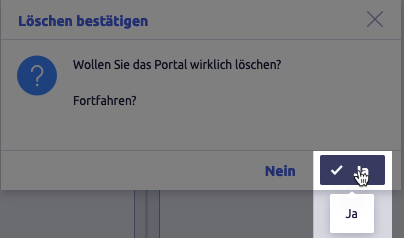
-
confirm with Yes or cancel with No
Save a portal
-
select PortalADM
The window Load portal configurations opens.
-
click the button
next to the portal name you require -
click the button Save portal
The image shows where you find the button Save
:
The portal will be saved.
Save a portal as
-
select PortalADM
The window Load portal configurations opens.
-
click the button
next to the portal name you require -
click the button Save portal as

The image shows where you find the button Save as
: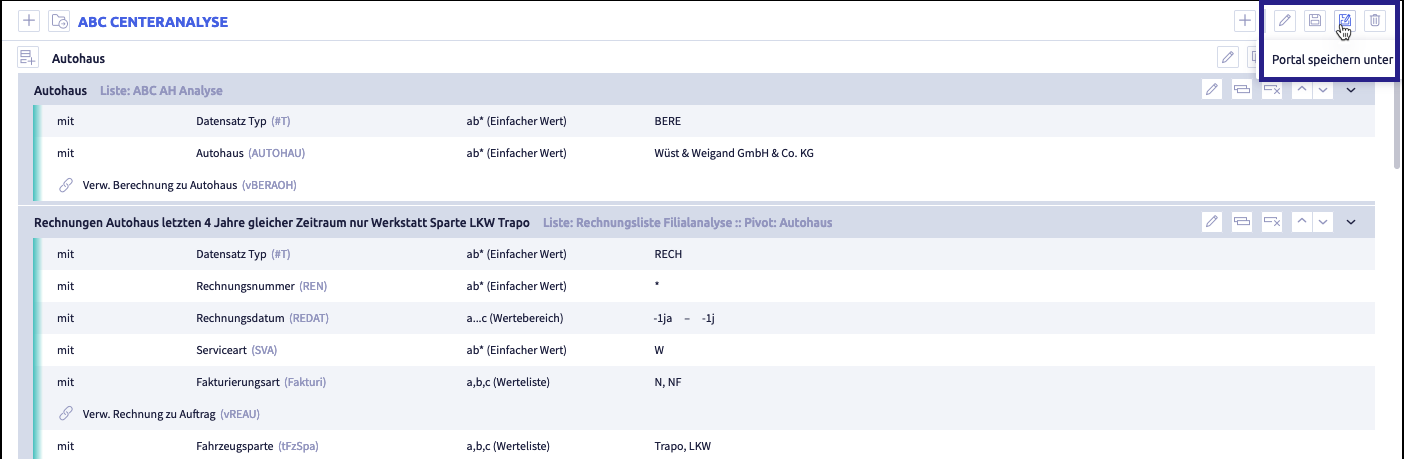
The following window opens:
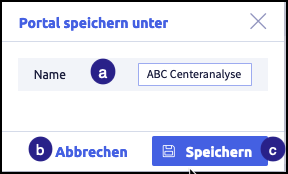
The image shows the possible actions you can take
- change the name
- cancel
- save
Apply a portal
Open a portal to apply
- call up the option Portal from the burger button
- click the button Load portal
- select the portal you require
Setting the start portal
As soon as you have more than one portal to select from, a start portal will be set. The start portal is the portal that will open when you click the option Portal.
-
call up the option Portal
from the Burger button The start portal opens.
-
click the button Load portal
-
select the portal you require
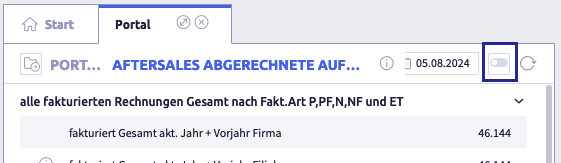
The image shows the currently open portal. The toggle that sets this portal as the start portal is framed.
-
click the toggle to set the portal that is currently open as start portal
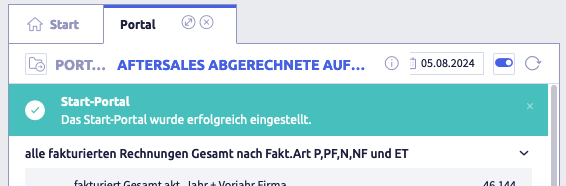
The toggle will turn blue.
A success message opens:
Show start portal on start page
On the start page, the start tab can be replaced with the start portal by removing the Starting template in the system settings in the User section.
Organize portal definitions into groups
To organize portal definitions into groups, call up the system settings from the burger button ![]() and then Portals:
and then Portals:
If the function Groups is active, the record types can be organized into groups for simplified management.
The following actions are possible:
- create groups
- rename groups
- delete groups
- add elements to a group
- remove elements from a group
Note
The actions are shown using the example Field management.
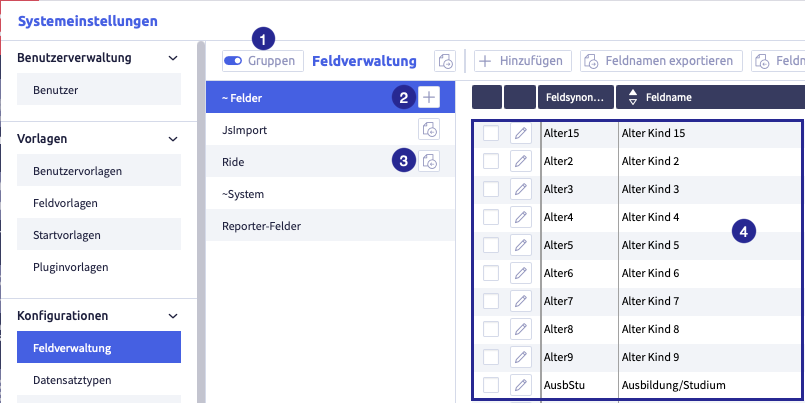
The image shows the field administration with active groups: (1) button Activate groups, (2) button Add group
, (4) fields from the currently active group
Create a group
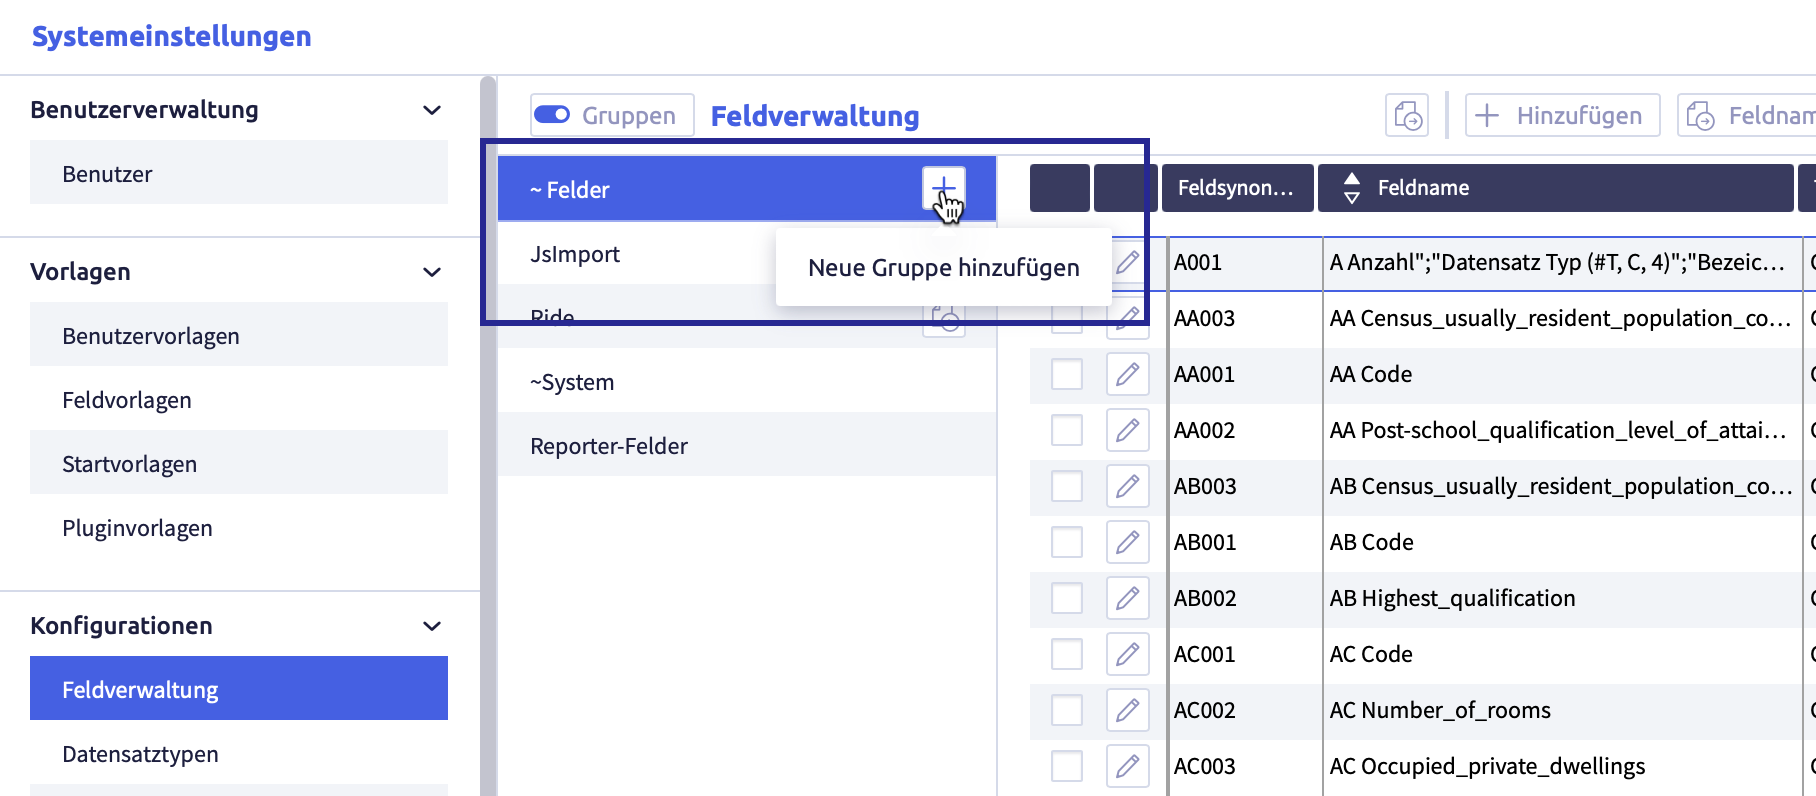
The image shows the field administration with active groups
Create user-defined groups
-
click the button Add group
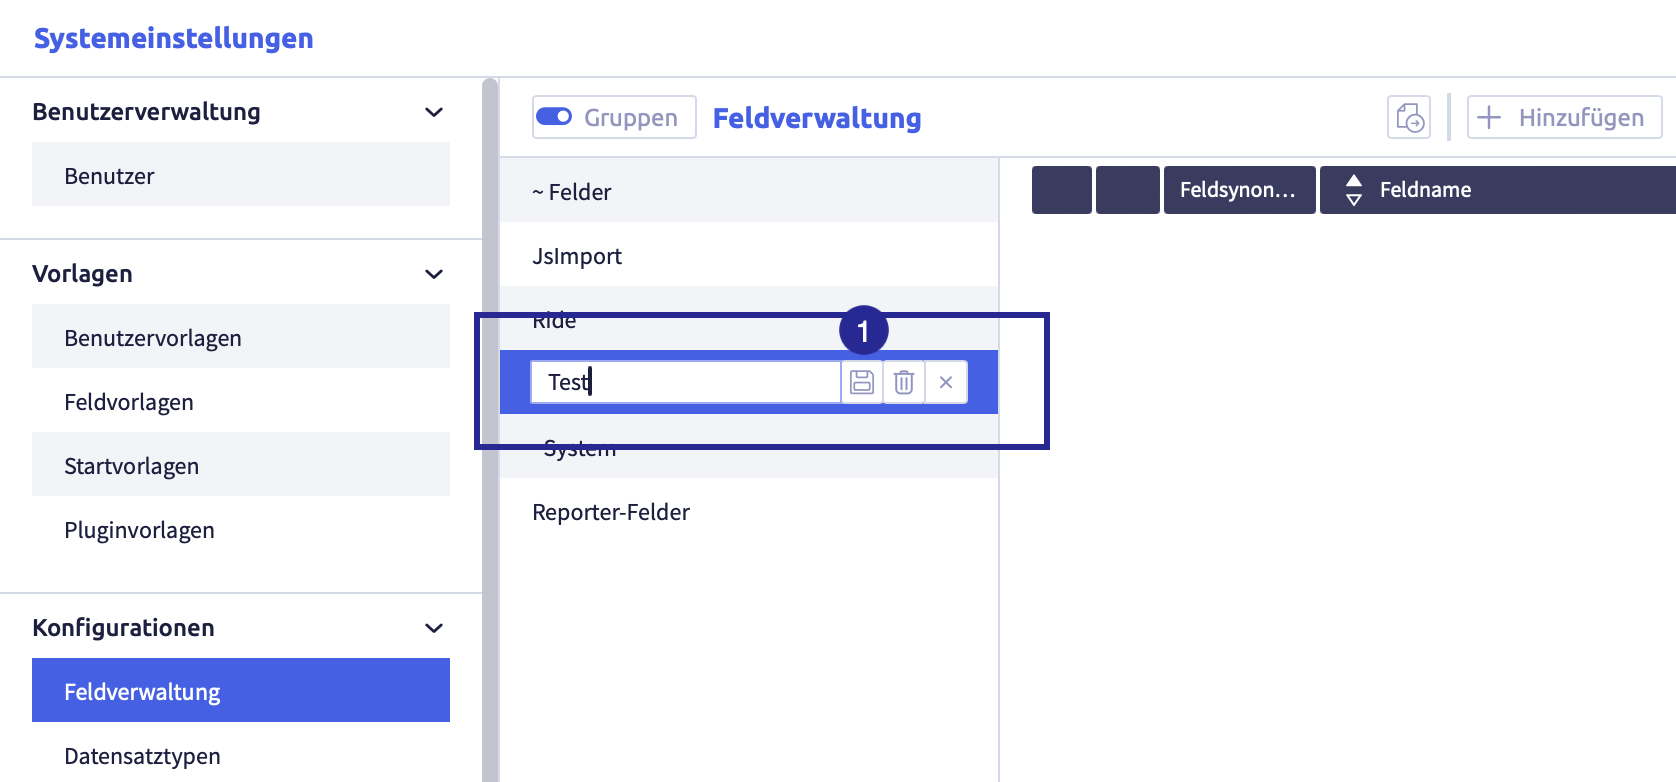
A new row will be added:
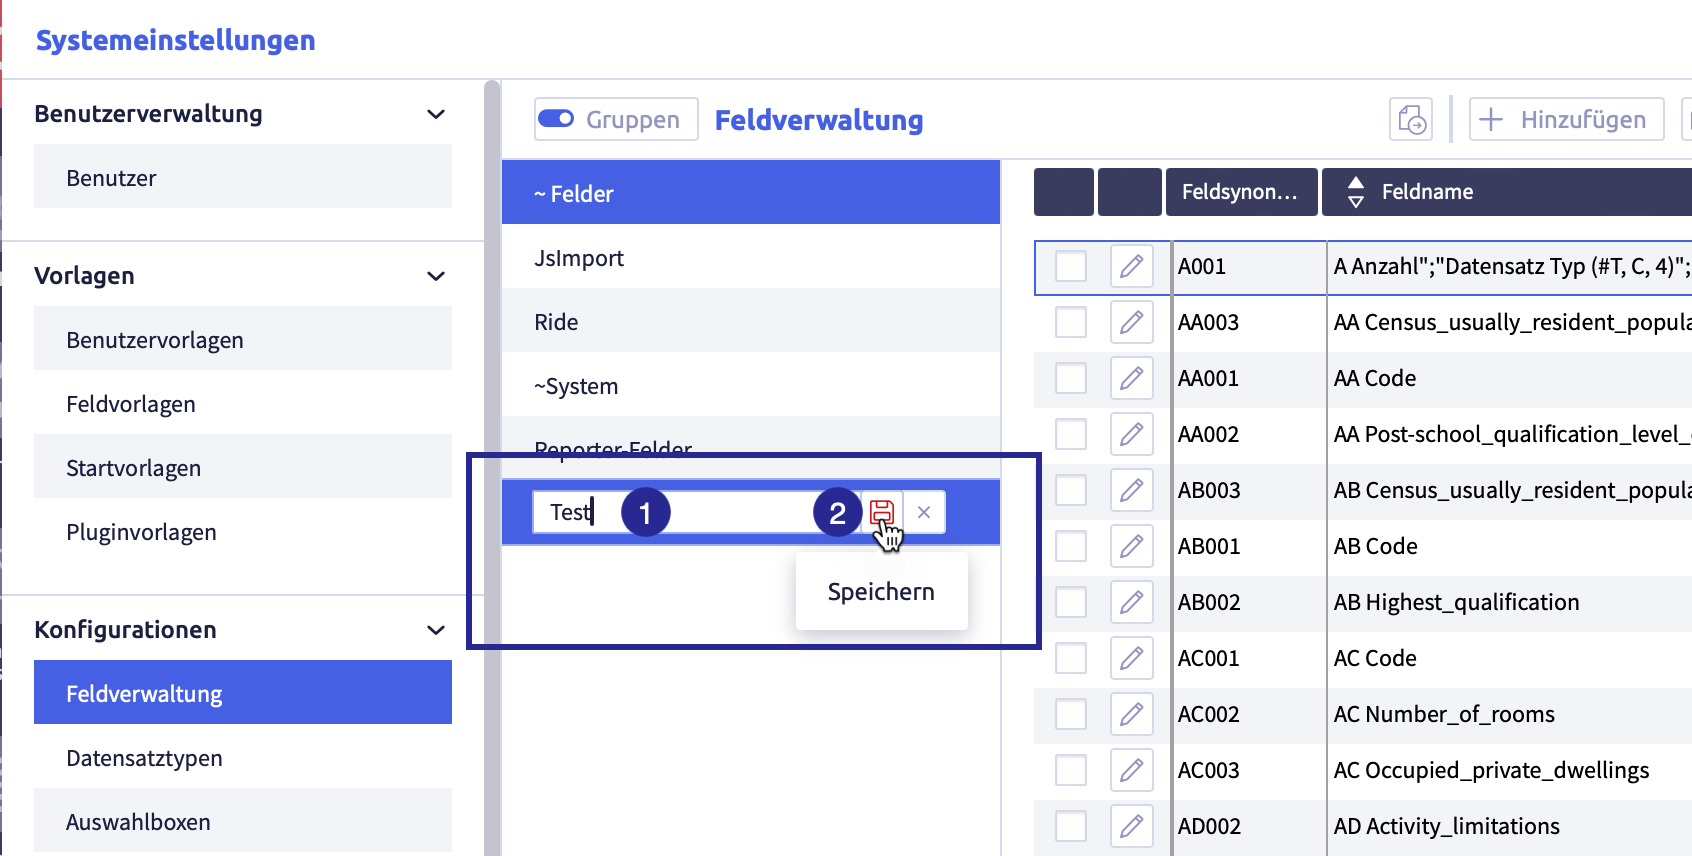
-
enter the name of the group
-
click the button Save
The list with the group names will be updated, the group has been sorted alphabetically.
Rename a group
-
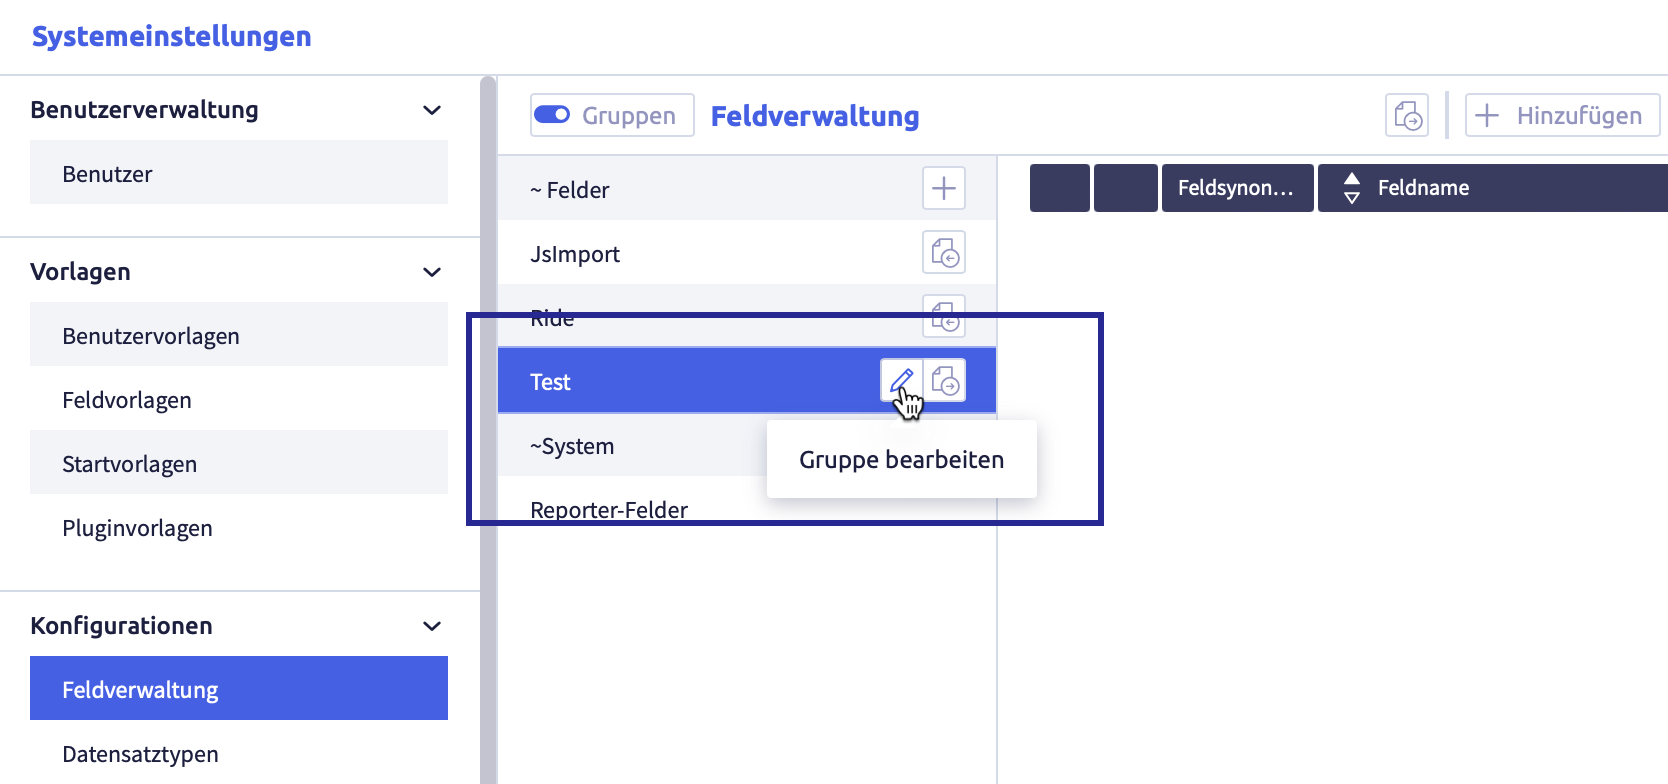
click the group you want to edit
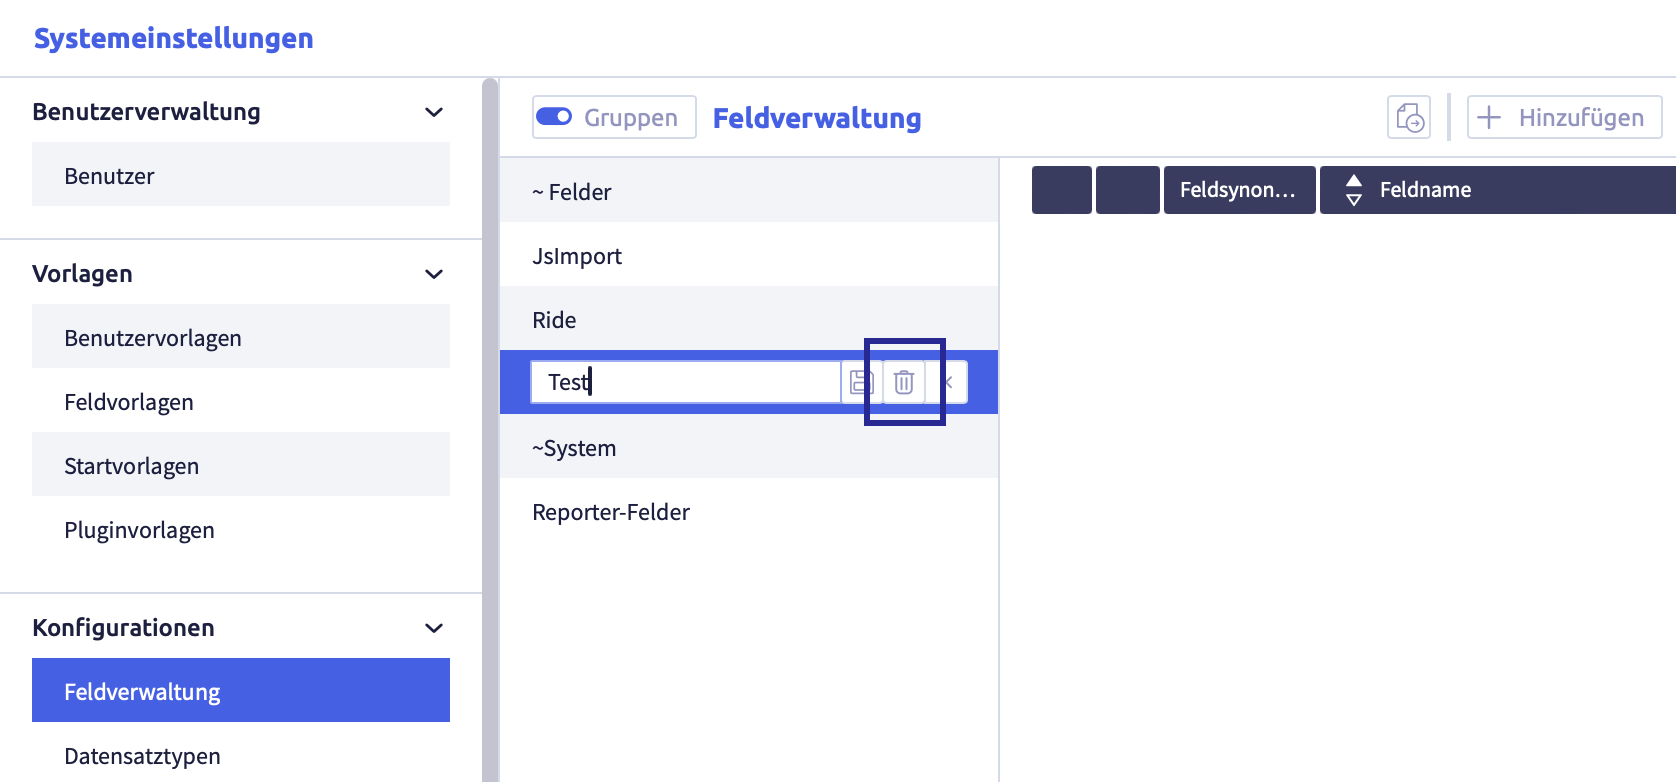
The button Edit
will appear.The image shows the group that can be edited:
-
click the button Edit
The element can be edited or deleted.
The image shows the edit possibilities of the group:
-
edit the group name
-
click the button Save
(or Cancel)The list with the group names will be updated, the group has been sorted alphabetically.
Delete a group
-
click the group you intend to edit
The button Edit
will appear.The image shows the group that can be edited:
-
click the button Edit
The element can be edited.
The image shows the edit possibilities of the group:
-
click the button Delete
The following confirmation window opens:
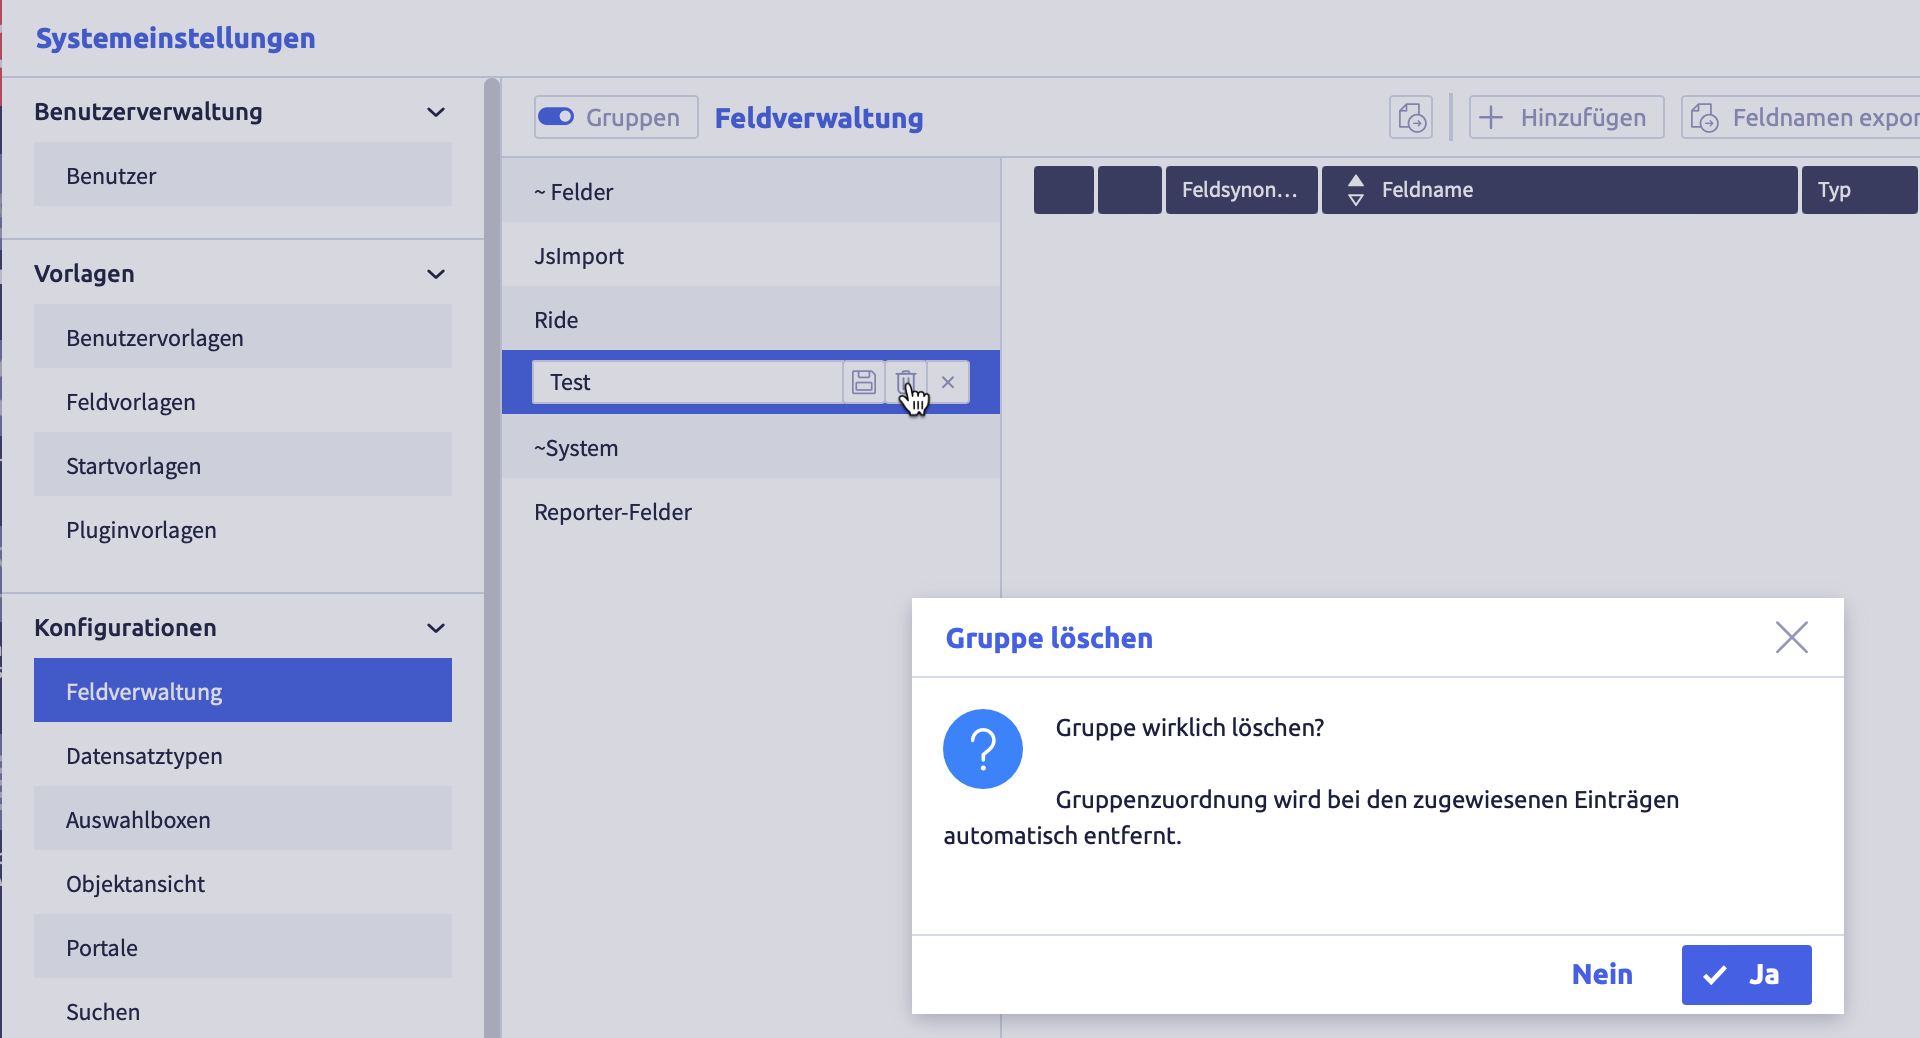
-
click the button Yes (or No)
The group will be deleted and the list of groups will be updated.
Links of elements to this group are automatically deleted.
Add elements to a group
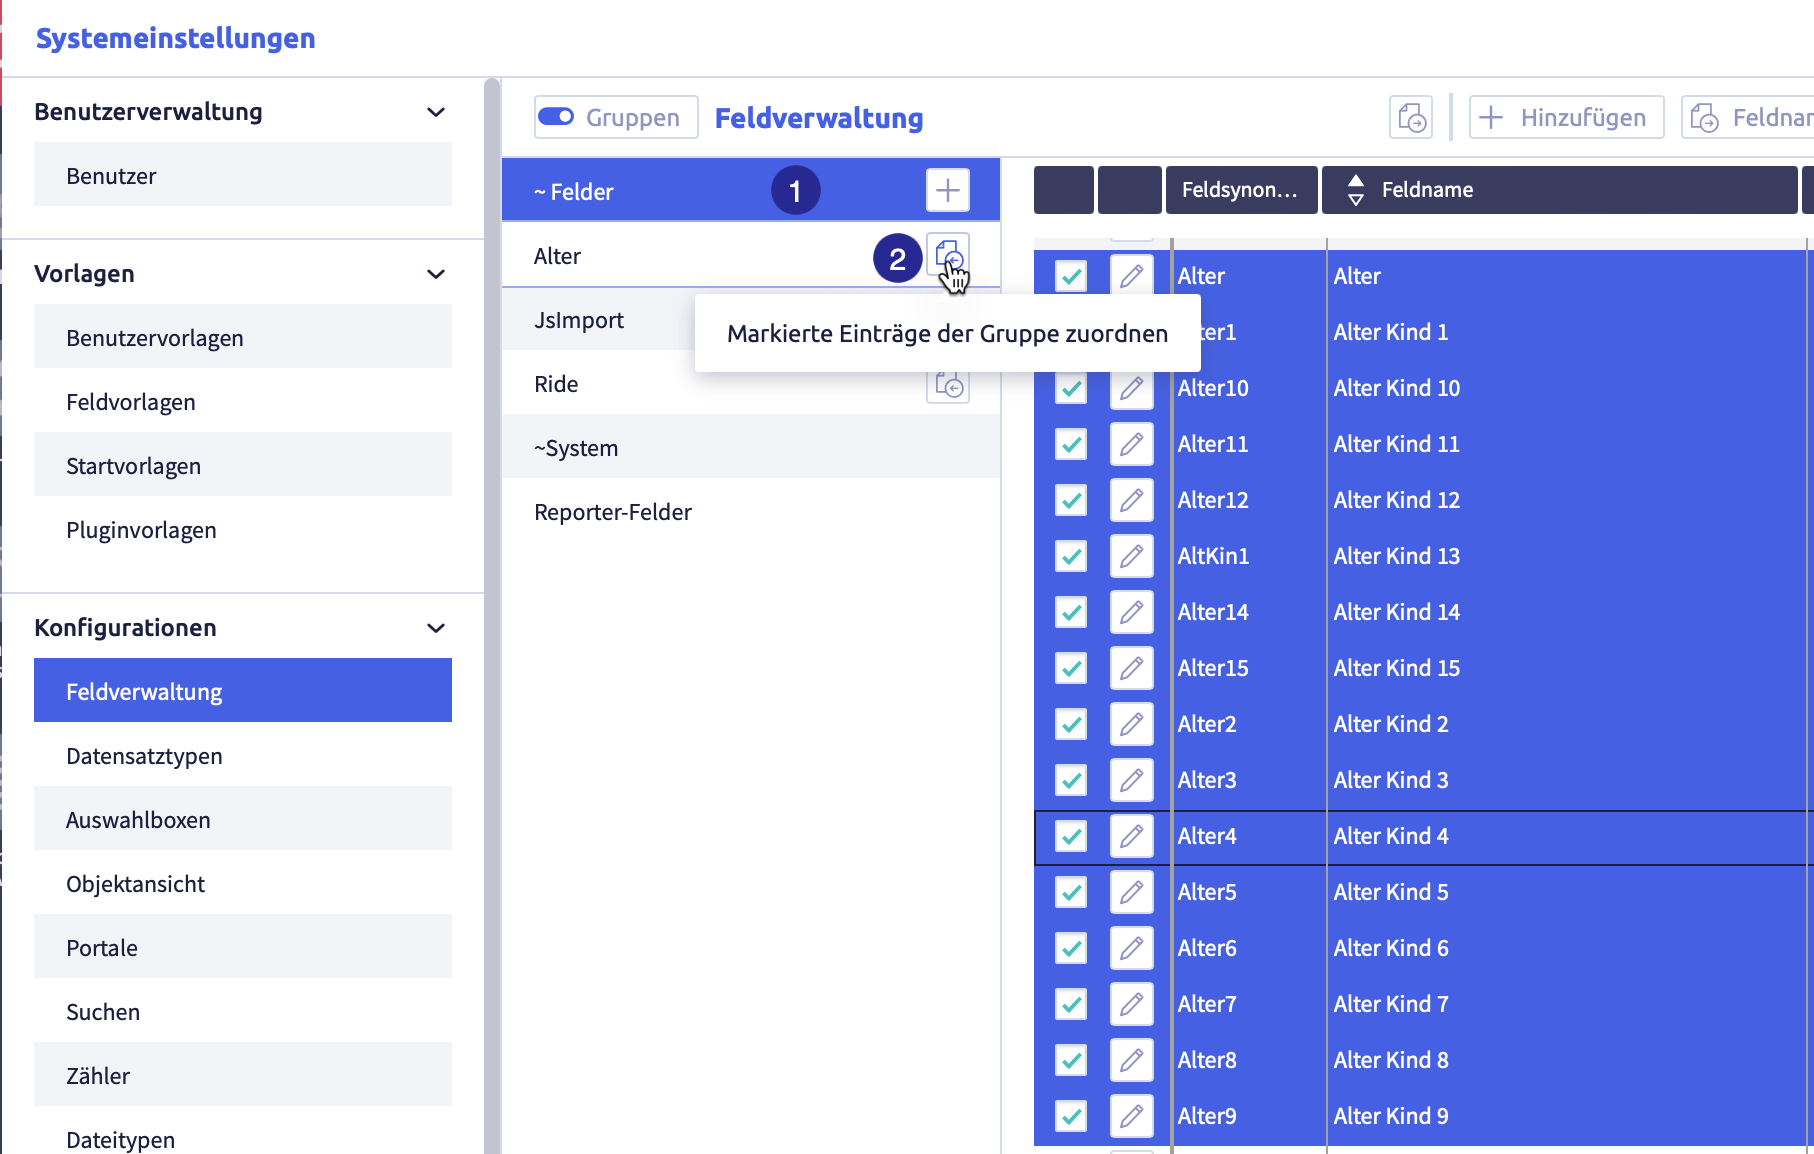
(1) selected group with selected elements you want to add to another group, (2) button Assign selected entries to the group
-
select a group from which you want to add elements to another group
-
select all the elements you want to add to the group
-
click the button Assign selected items to group
of the new groupThe elements are added to the group.
An element can belong to several groups.
Remove elements from a group
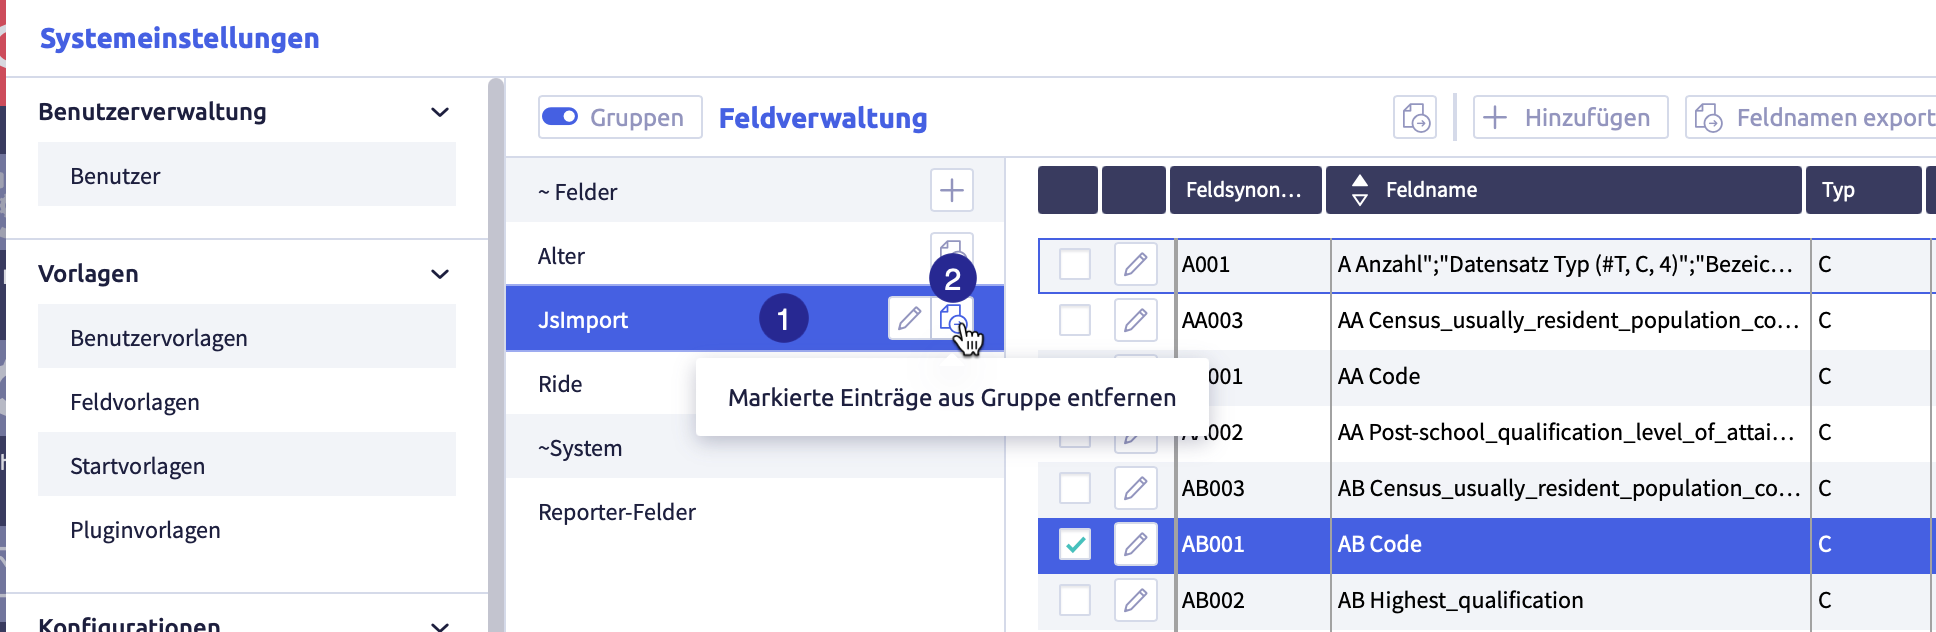
(1) selected group with selected elements to be removed from the group, (2) button Remove selected entries from group
-
click the group from which you want to remove elements
-
select all the elements you want to remove from the group
-
click the button Remove selected items from group
 of the group
The elements will be removed from the group.
Export and import portal definitions
To export or import portal definitions, call up the system settings from the burger button ![]() and select Portals. The following exports and imports are possible:
and select Portals. The following exports and imports are possible:
Each export is only carried out for selected rows in the list of portal definitions.
Image with buttons for export and import
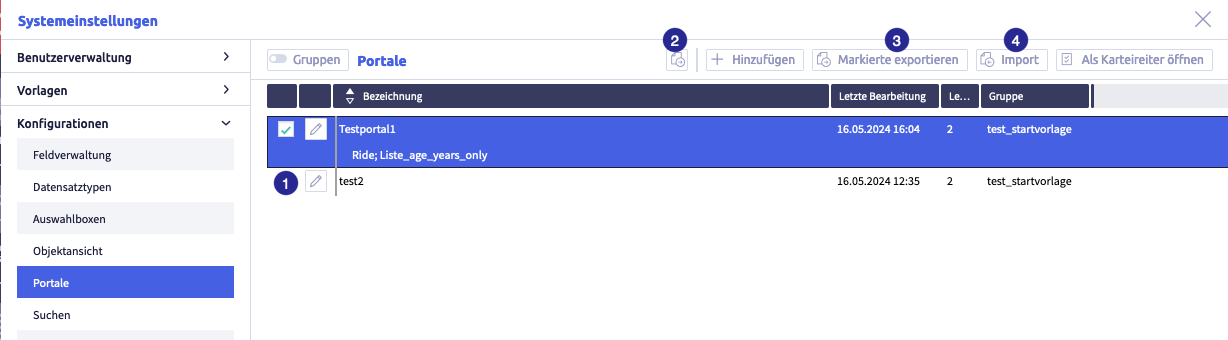
The image shows the export and import buttons: (1) checkbox to select row, (2) button Export selected data as CSV
Export selected data as CSV file
Image with buttons for export and import
The image shows the export and import buttons: (1) checkbox to select row, (2) button Export selected data as CSV
-
select the rows you want to export
-
click the button Export selected data as CSV
The CSV file will be downloaded and saved in the download folder (or the folder that was set for it in the browser).
The file name will be generated automatically and is called #Portaldefinitions.csv.
A list with the following information will be exported:
| Column | Meaning | Note |
|---|---|---|
| Name | name of the portal | |
| last edit | time of the last editing | |
| last editor | user ID of the last editor | |
| group | name(s) of the portal group(s) | |
| lists | lists assigned to the portal |
Export selected definitions
Portal definitions exported in that way can be imported back into a CortexEngine.
Image with buttons for export and import
The image shows the export and import buttons: (1) checkbox to select row, (2) button Export selected data as CSV
-
select the rows you want to export
-
click the button Export selected
The following window opens:

A .tar file will be downloaded and saved in the download folder (or the folder that was set for this in the browser).
The file name will be generated automatically.
Import definitions
Exported definitions from another CortexEngine can be imported into the current CortexEngine using the button Import ![]() .
.
Image with buttons for export and import
The image shows the export and import buttons: (1) checkbox to select row, (2) button Export selected data as CSV
-
click the button Import
The following window opens:
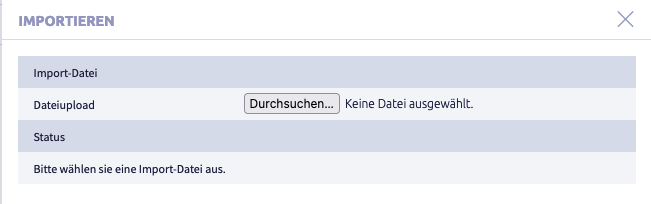
-
click the button Select file
A window with a file folder opens.
-
select a file
The following formats are suitable for import:
- .tar
- .tar.gz
- #Prt.ctxexp
-
click the button Import
The following window opens (example: Import of a .tar-file):

-
click the button Close
The list with all portal definitions will be displayed again.