Input mask
A new record is filled in or an open record is edited in the input screen.
The input mask contains all visible fields of the record. The record type defines the layout, fields, field properties etc. of the record.
The permission to create and edit records is defined in the user administration and, if required, restricted to defined roles.
The following actions are possible:
Add a record
A new record is always based on a record type and can be added in these ways:
-
create completely new using
All fields for entry are still blank at the start of editing.
-
append to an existing record
For an appended record, the link field to the original record is already filled in at the start of editing, all the other fields to be edited are still blank.
Create a new record using the Add button
-
click the blue button Add
 in the header
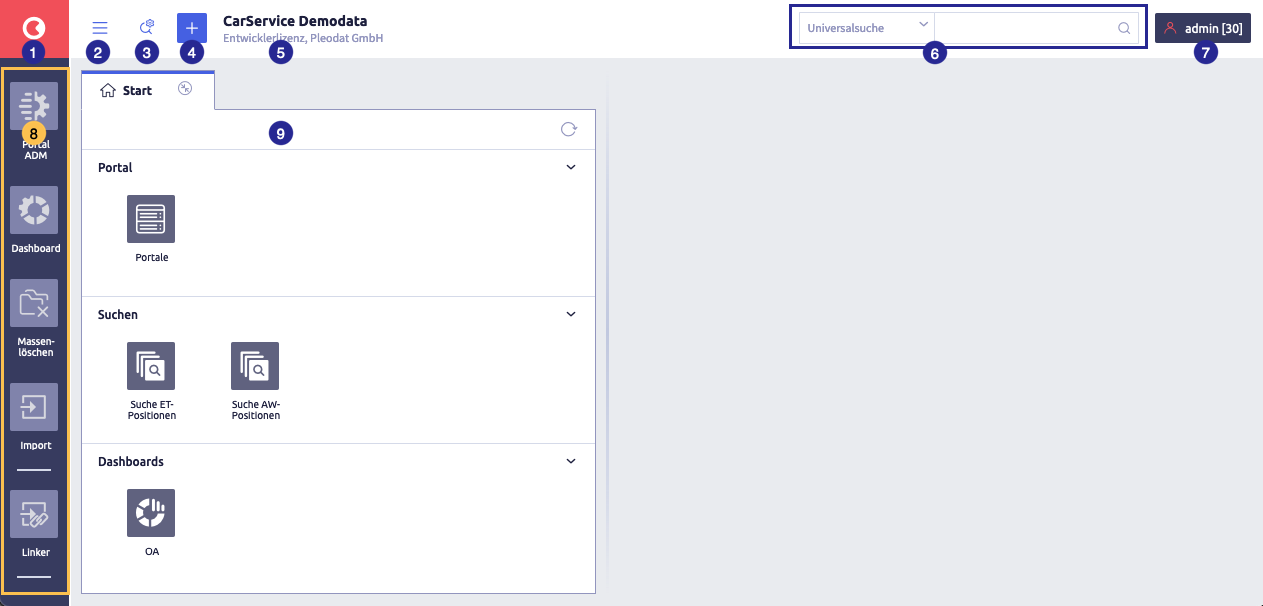
The image shows the start page for CarService Demodata with a reduced start tab: (1) button for information about the Uniplex, (2) hamburger menu
 , (3) button Select via list definition
  , (4) button Add to create a new record, (5) name of the open data inventory, (6) search with input field, (7) button with user name in the header, (8) quick start bar with plugins, (9) elements of the start tab
The following window opens:
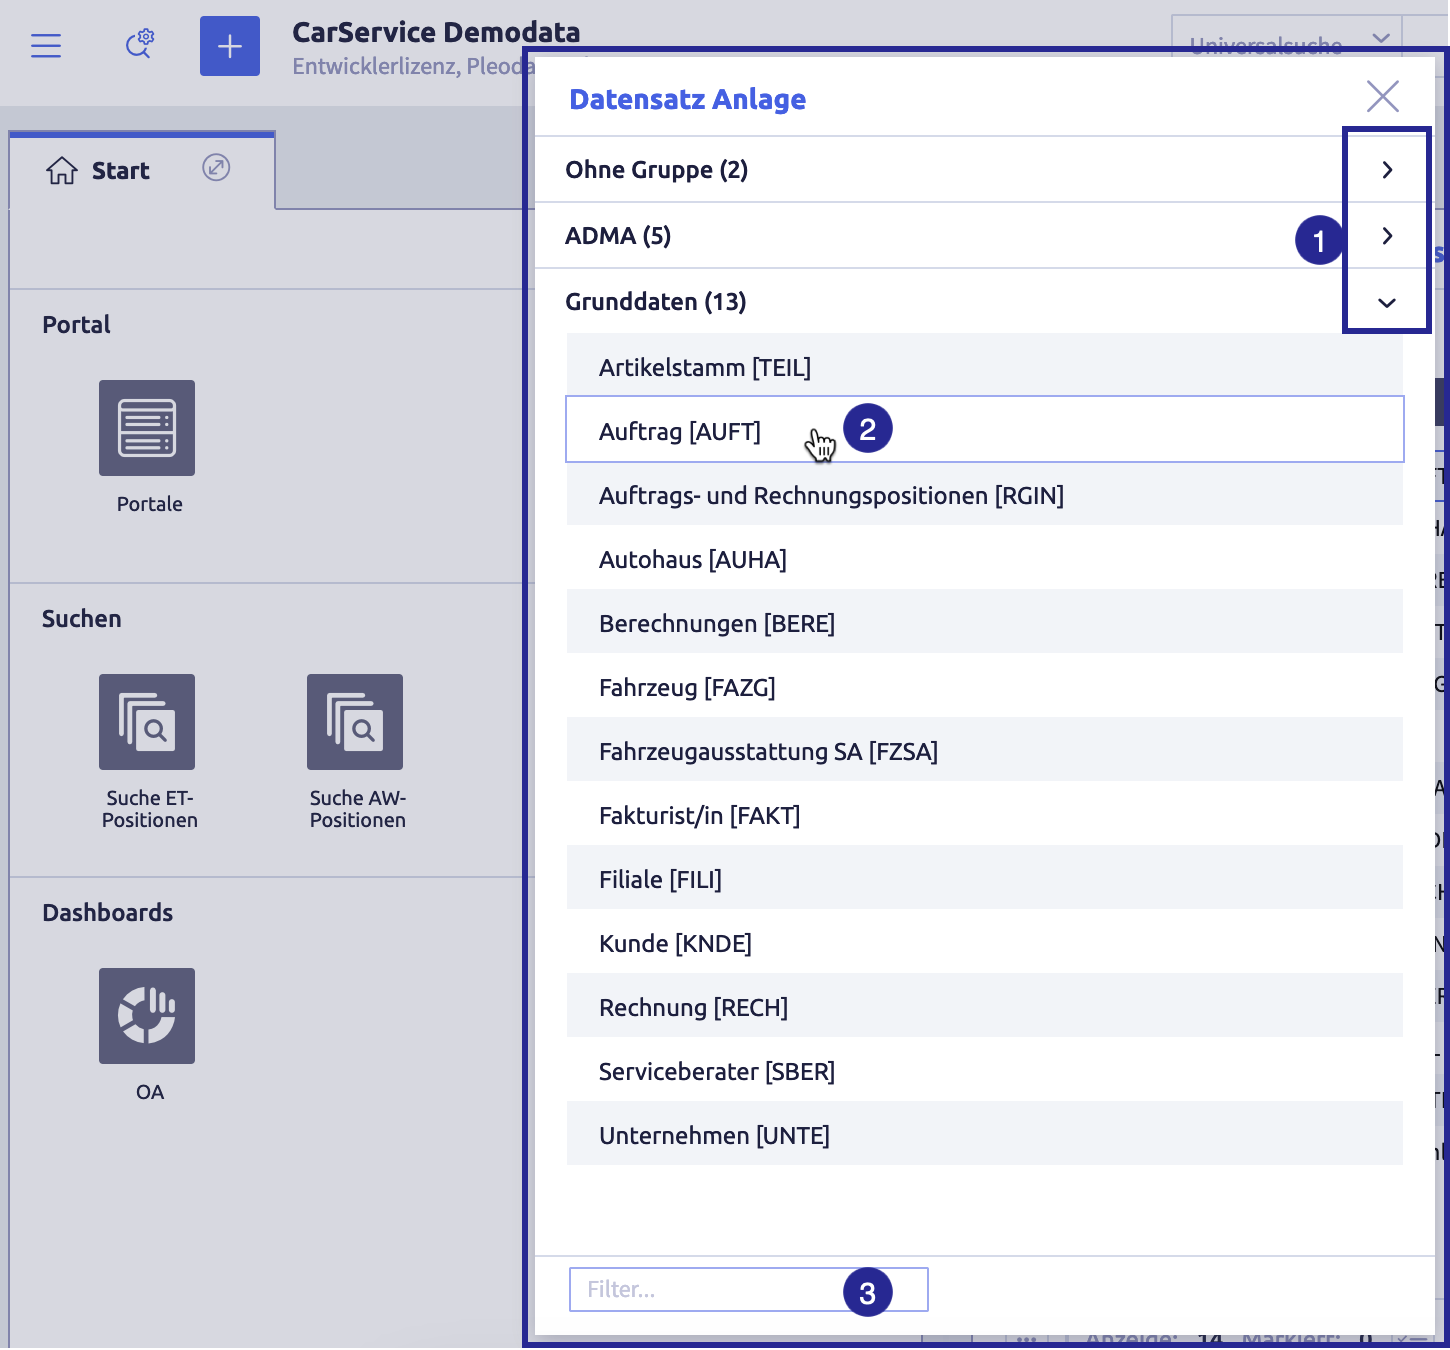
The image shows the available record types: (1) open / close record type group, (2) record type, (3) Filter field to search for a record type
-
select a record type
If necessary, use the filter field.
The input mask opens.
Best practices for the filter field
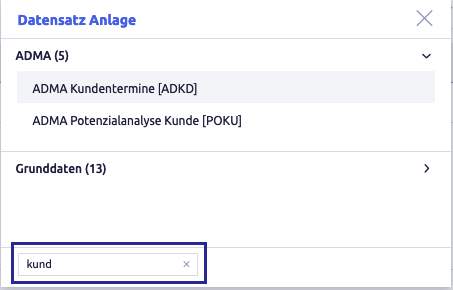
The image shows the filter result using the example of the input "kund" with the ADMA group open.
-
It is sufficient to enter part of the character string of the name or abbreviation (synonyms) of the record type (framed in the screenshot).
The input is not case-sensitive, the correct sequence of characters is sufficient.
-
If the search result (one or more matches) is contained in the last record type group opened, the matches in this group are displayed directly (in the example, the entries in the ADMA (5) group).
- If the search result (one or more matches) is contained in another record type group, the closed group containing the match is displayed (in the example, the basic data (13) group).
-
-
edit all fields as required
-
click the button Save
 (or Cancel
  ) at the top right of the record view
The input mask will close.
Create a new record using open record
-
click the selection menu
 in an open record
The following window opens:
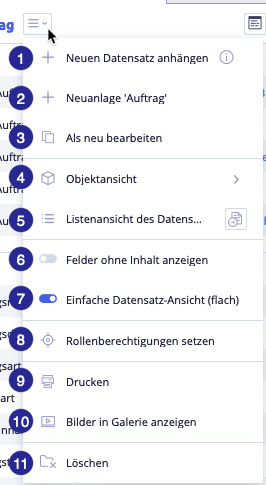
The image shows the selection menu in the record: (1) append new record, (2) new "Auftrag", (3) edit as new, (4) object view, (5) list view of the record, (6) toggle Show empty fields, (7) toggle Simple record view (flat), (8) set role permissions, (9) print, (10) show images in gallery, (11) delete
-
select New 'Name of record type'
The input mask opens.
-
edit all fields as required
-
click the button Save
(or Cancel ) at the top right of the record viewThe input mask will close.
Append new record to a record
-
click the selection menu
in an open recordThe following window opens:
The image shows the selection menu in the record: (1) append new record, (2) new "Auftrag", (3) edit as new, (4) object view, (5) list view of the record, (6) toggle Show empty fields, (7) toggle Simple record view (flat), (8) set role permissions, (9) print, (10) show images in gallery, (11) delete
-
select Append new record
The input mask opens.
-
edit all fields as required
-
click the button Save
(or Cancel ) at the top right of the record viewThe input mask will close.
Edit a record
-
open an already existing record
How to open a record
- using a record type
- using a search result
- using a list
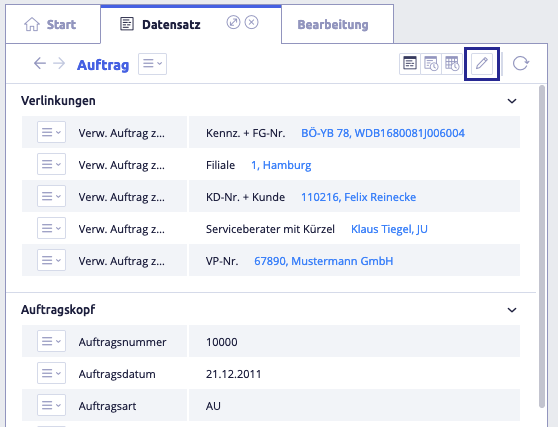
The image shows the upper part of an open record.
-
click the button Edit

The input mask opens.
-
edit all entries as required
-
click the button Save
(or Cancel ) at the top right of the record viewThe input mask will close.
Edit the input mask
An element/field is usually configured under field administration and / or under record types.
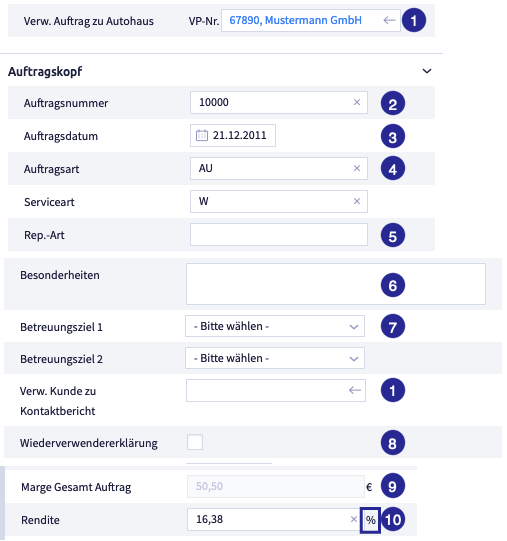
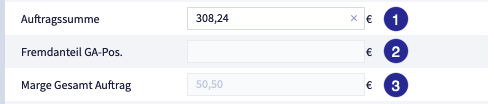
The image shows cropped sections of an input mask for an existing record: (1) link field, (2) number field with content, (3) selected date, (4) text field with content, (5) empty text or number field, (6) empty multi-line text field, (7) selection, (8) checkbox, (9) prefilled text/number field that can be read only, (10) example of a suffix at the field (configuration in record type)
Overview of all the elements available for the input mask
| Name (field type) | Meaning | Note |
|---|---|---|
| text field (character (C)) | enter free text default number of characters: 220 maximum number: 220 |
suggestions available depending on your record type configuration |
| multiline text field (M) | enter free text | |
| number field (positive integer (N) oder Float (F)) | input of numbers without (N) and with decimal places (F) | input of decimal numbers with decimal point |
| date (D) |
date entry options: manual Date picker (calendar) 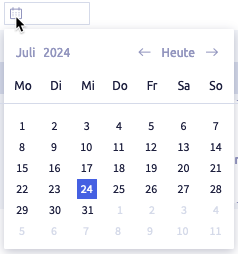 relative date |
pattern of the manual input format for times and dates: YYYYMMDDhhmm |
| time (T) |
additional field to the date field | scheme of the manual input format for time and date: YYYYMMDDhhmm example: Date 09/21/2011 is entered as 20110921 |
| link if necessary together with |
link to another record | |
| selection |
a list of possible contents from which an entry is selected | example: addressing a person The list is generated either using the field dictionary or using a global select box. depending on the configuration of the record type, it is possible for different fields to be displayed, depending on the select box. |
counter  |
- clicking on the button generates an automatic numbering according to the counter configuration - record type includes corresponding configured counter field |
A counter always needs to be added manually. Once it has been set and saved, you can no longer change it. It is possible to set the counter at any time. |
checkbox  |
depending on the configuration of the record type, it is possible that various fields are displayed, depending on the status of the checkbox. | |
file selection 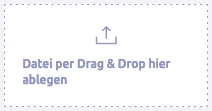 |
upload a file | |
| history field |
saves changes to the field content and shows the history of the field content storage options valid until / valid from |
not relevant when creating a new record for display options, see record view |
| repetition field | add multiple contents to a field | example: several telephone numbers or payment methods |
| pretext and suffix on the field | complements the field content | example for suffix: unit such as %, € |
Notes on fields: visibility and editing permissions
The image shows exemplary fields: (1) field that can be edited directly, (2) field that can only be read, (3) automatically completed field that can be read only
-
It may be that some fields are invisible or only available to entitled users for editing (read only for all others), depending on the configuration of the field template for user or the layout of the record type.
-
Fields may be filled in automatically, e.g. for calculations.
These fields (or their attributes) are usually configured to be read only and cannot be edited.
-
Some fields may be displayed or hidden depending on the status of a checkbox or select box.
This fade-in and fade-out is configured in record type.
Edit field content in an input field
The field content of an input field for text or numbers can be edited or deleted manually. Depending on the field type, there is a Delete ![]() button on the right-hand side of the field to delete the field content completely.
button on the right-hand side of the field to delete the field content completely.
Edit a link field
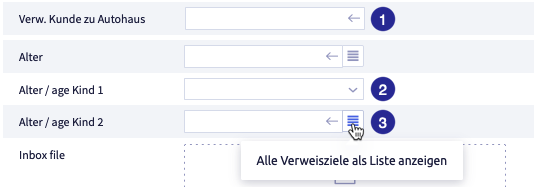
The image shows the options for selecting link targets: (1) using exact entry (of the beginning) of the target's character string, (2) using dropdown selection, (3) using an additional list
There are several ways you can select link targets, depending on the configuration of the link field:
-
enter the initial characters to reduce the number of possible destinations or enter the exact character string
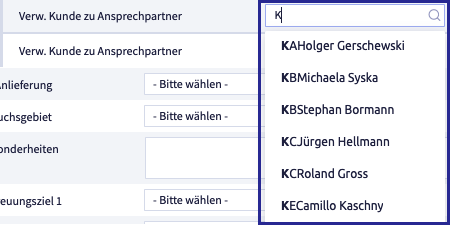
The image shows a selection list for the initial letter K.
-
With a click in the field, six results are displayed as a selection list.
The input of characters changes the selection list.
-
Please note that the input of the initial characters is case-sensitive.
Up to six results are displayed directly. If the result you are looking for is not included, please enter more characters or correct your entry.
-
-
dropdown selection
The selection can be restricted by entering a character or a character string.
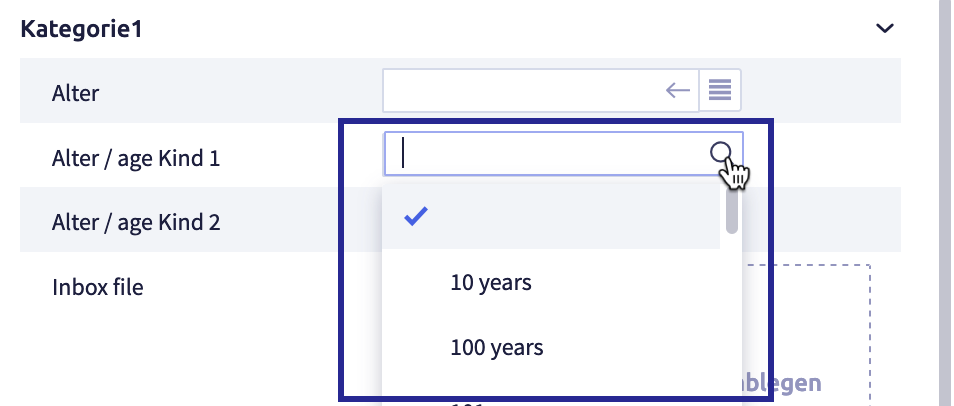
- The input is not case-sensitive.
- Results are also found for character strings that are not at the beginning of a list entry.
-
selection of the link target using a list, in addition to entering the exact character string
After clicking the button List selection
 a list will open on the right, which can be scrolled, sorted and searched.
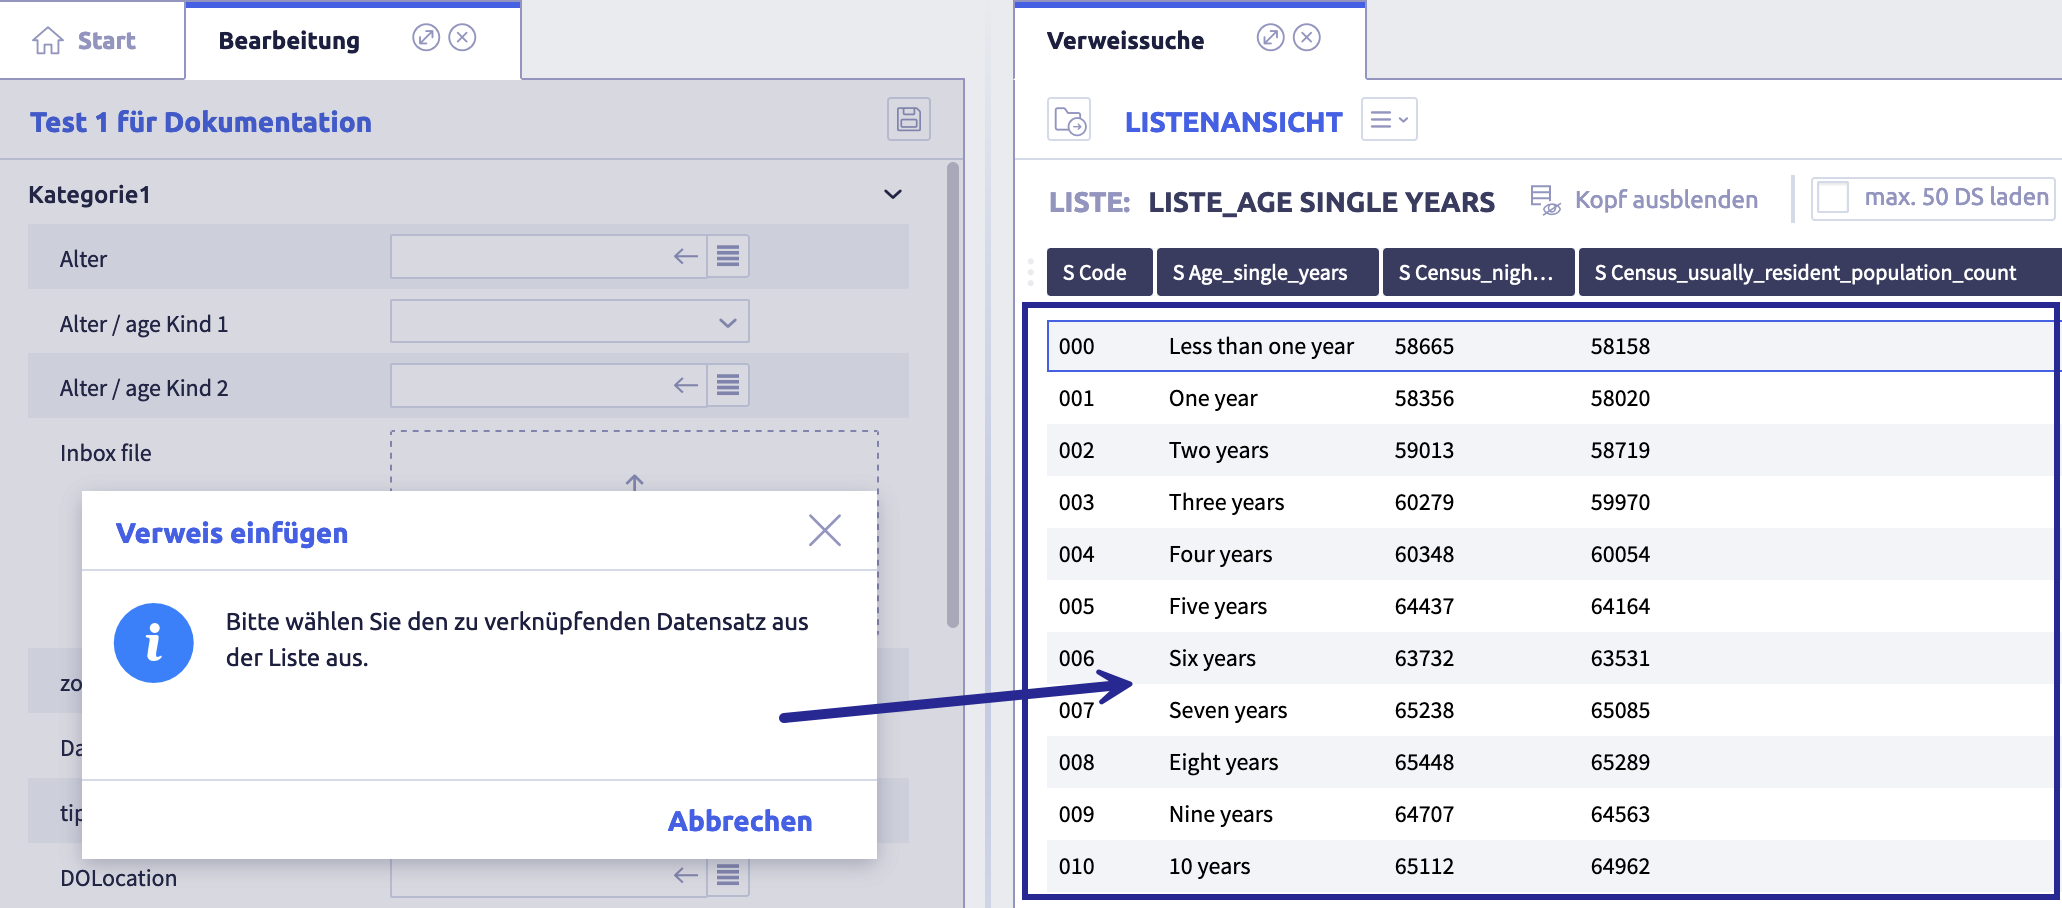
The completed fields appear as follows in the input mask:
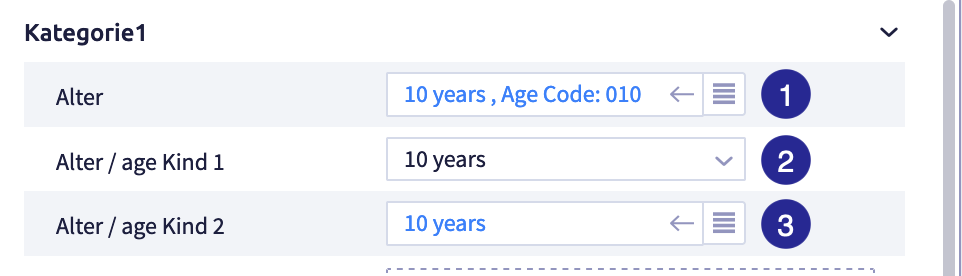
The field contents (1) and (3) are links and lead to the record referred to.
The field content (2) is a text without a link to the linked record.
Edit a relative date field
Note
When selecting date values, you can use variable specifications that apply based on the current or specified date. For example, a selection via "-2ws" for the beginning of the week from two weeks ago would be possible.
When you leave the field, the relative date is converted into a real date.
The table shows the available variables for date values:
| Abbreviation | Meaning | Note |
|---|---|---|
| y | year | |
| m | month | Example: -2m = today 2 months ago, +3m = today in 3 months |
| ms | start of the month | |
| me | end of the month | |
| w | week | |
| ws | start of the week | Example: -2ws = start of the week from two weeks ago |
| we | end of the week | |
| d | day | |
| q | quarter | |
| qs | start of quarter | |
| qe | end of quarter | |
| ys | start of the year | |
| ye | end of the year | |
| yd | yesterday | only single, i.e. valid without number |
| td | today | only single, i.e. valid without number |
| tm | tomorrow | only single, i.e. valid without number |
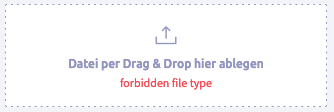
Upload file
All file types that can be uploaded are defined in the system settings under file types. Limitations to a selection of file types can be defined in the record type.
If you try to upload an invalid file type, the following warning opens:
Edit the history field
The history field can be edited in an existing record.
The following actions are possible:
Update field(s)
-
select one of the two history views left to the button Edit
A date field with the current date appears.
-
click the button Edit
-
change the value(s) as required
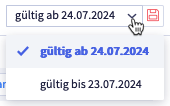
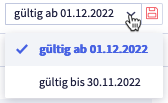
As soon as you leave the first field, the following selection appears in the header:
-
click the button Save
(or Cancel )The changed values are displayed in the record.
Change field(s) for a certain point in time
-
select one of the two history views left to the button Edit
A date field with the current date appears.
-
select the date you want to enter changes for
-
click the button Edit
-
change the value(s) as required
As soon as you exit the first field, the following selection appears in the header:
-
click the button Save
(or Cancel )The changed values for this date are displayed in the record.
-
change further values for other dates if required